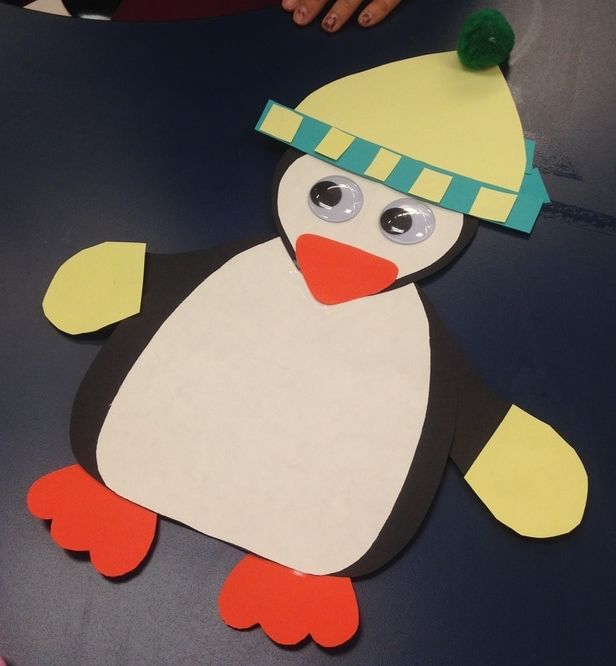
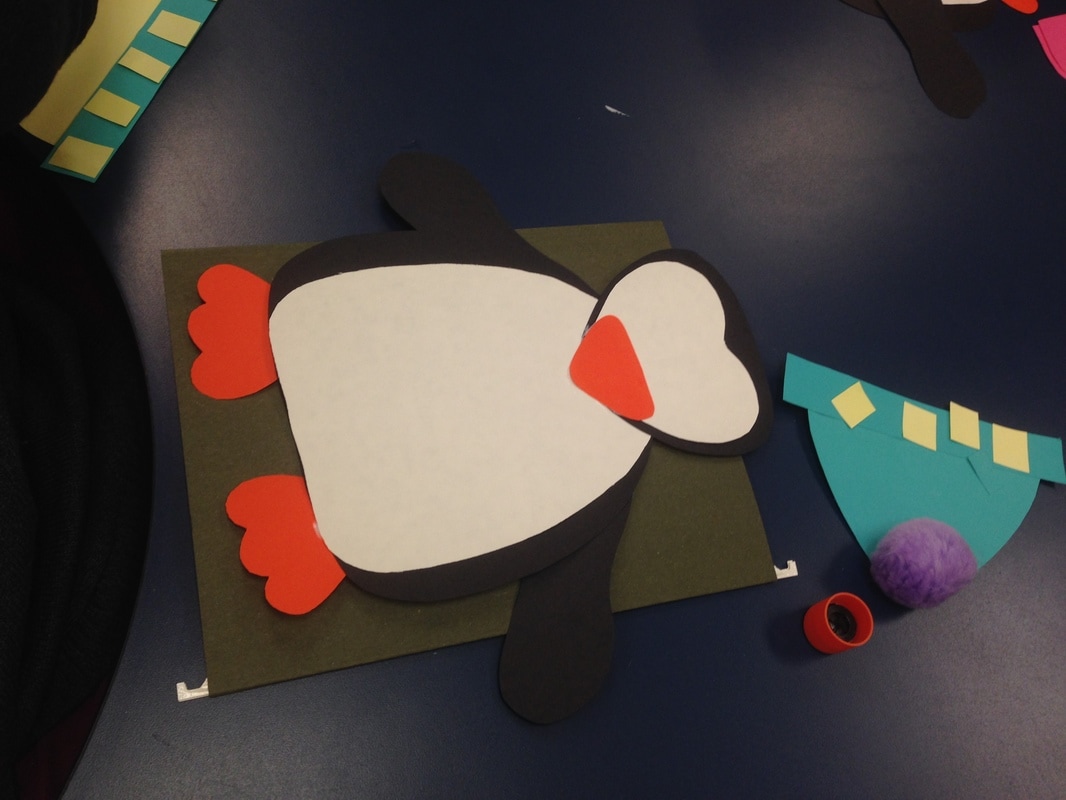
 Penguins and polar animals are a great theme to do during the Winter. We did a week long theme for penguins and another week of just polar animals, which included penguins. Our class had a great time learning about the animals, moving around like polar animals and doing fun crafts. We created a penguin during Speech Group. Each student was given the choice to pick between two or three colors for hats and mittens. Below are the step by step instructions and photos. Materials Needed:
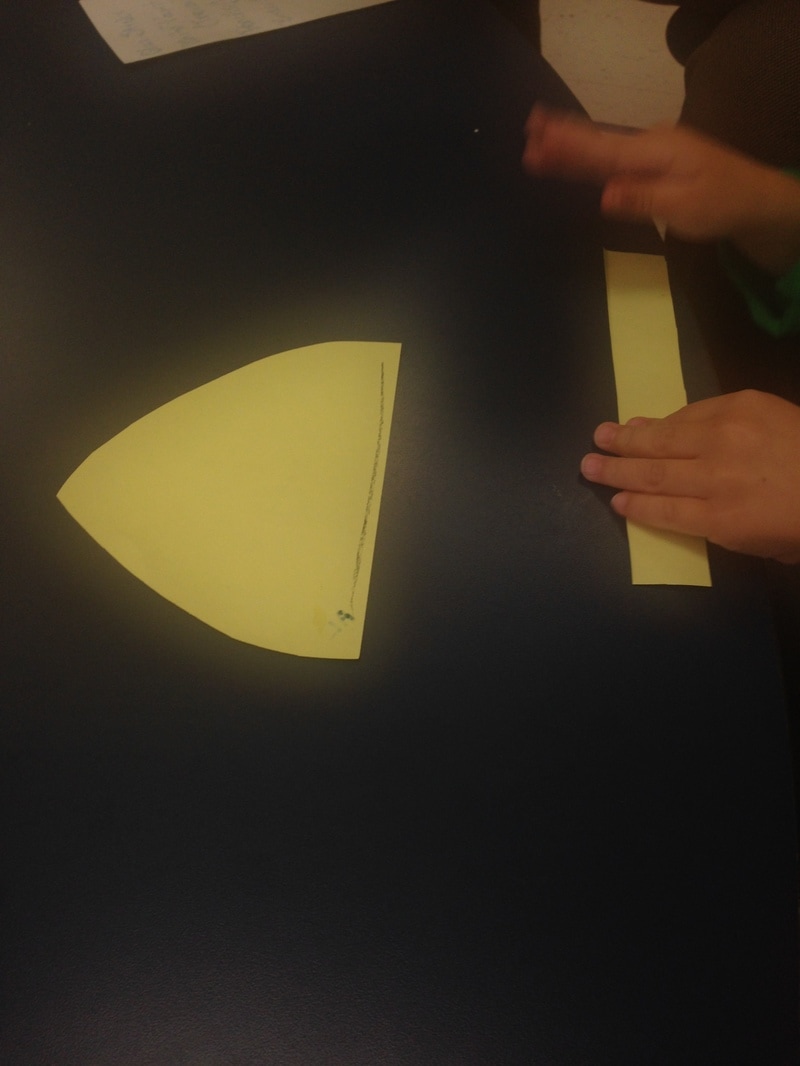
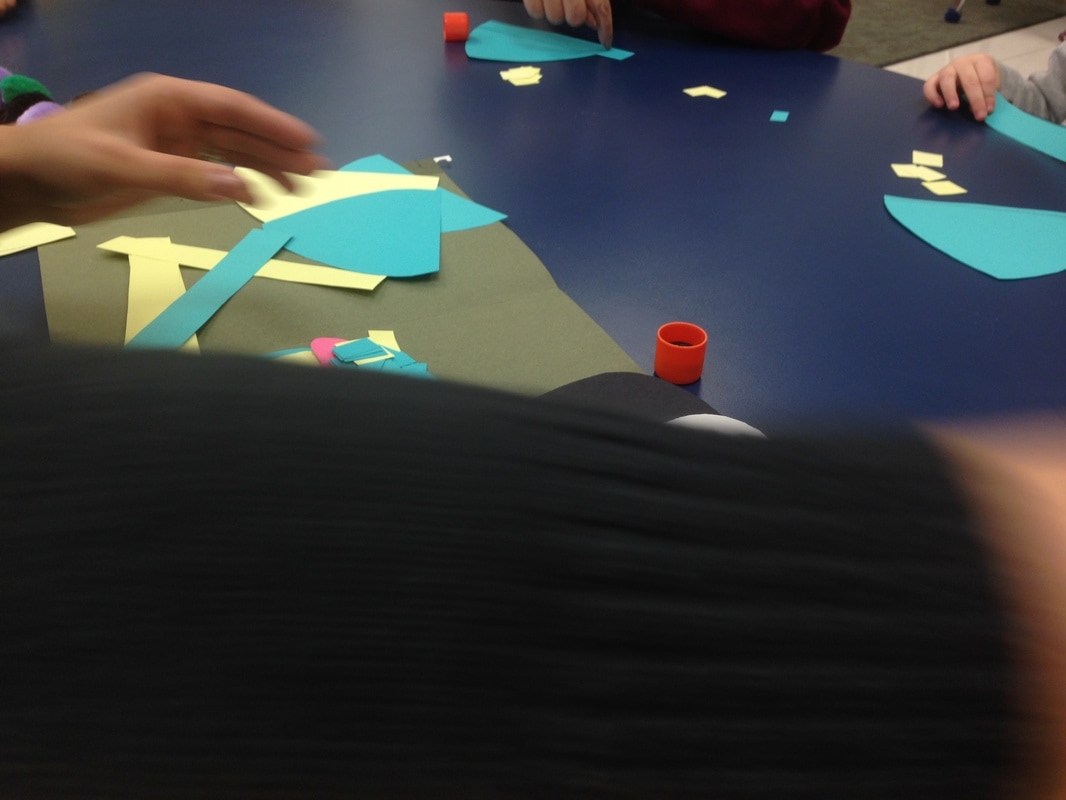
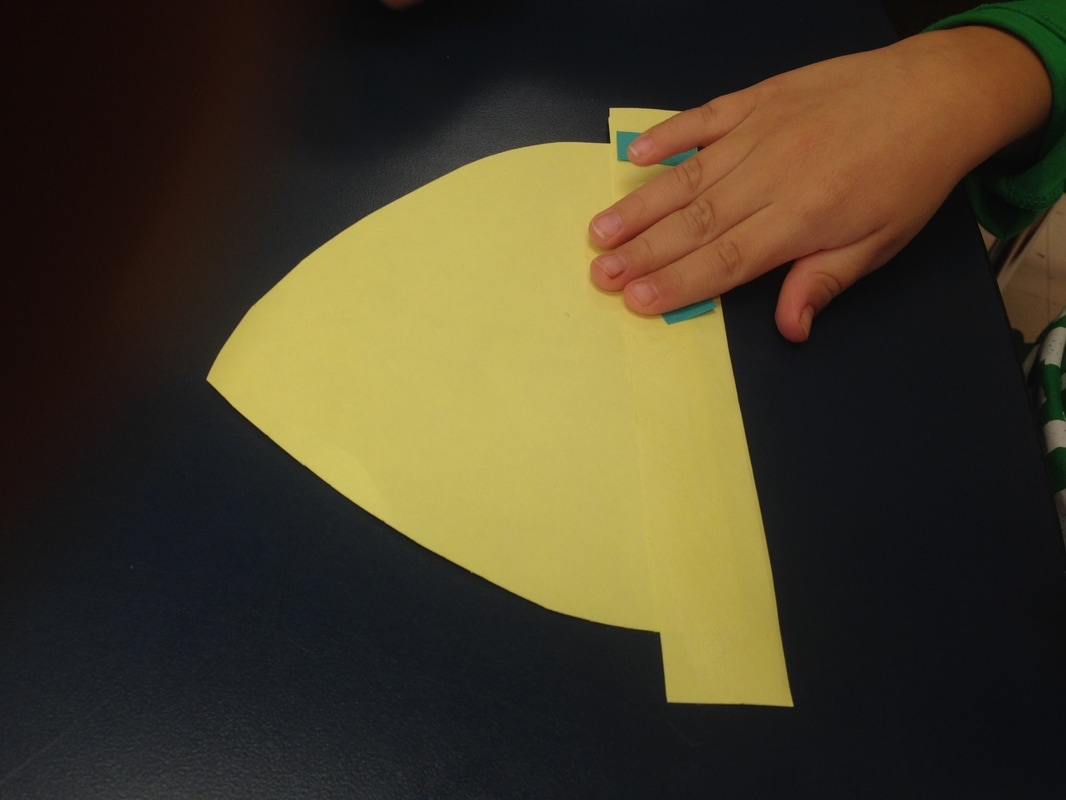
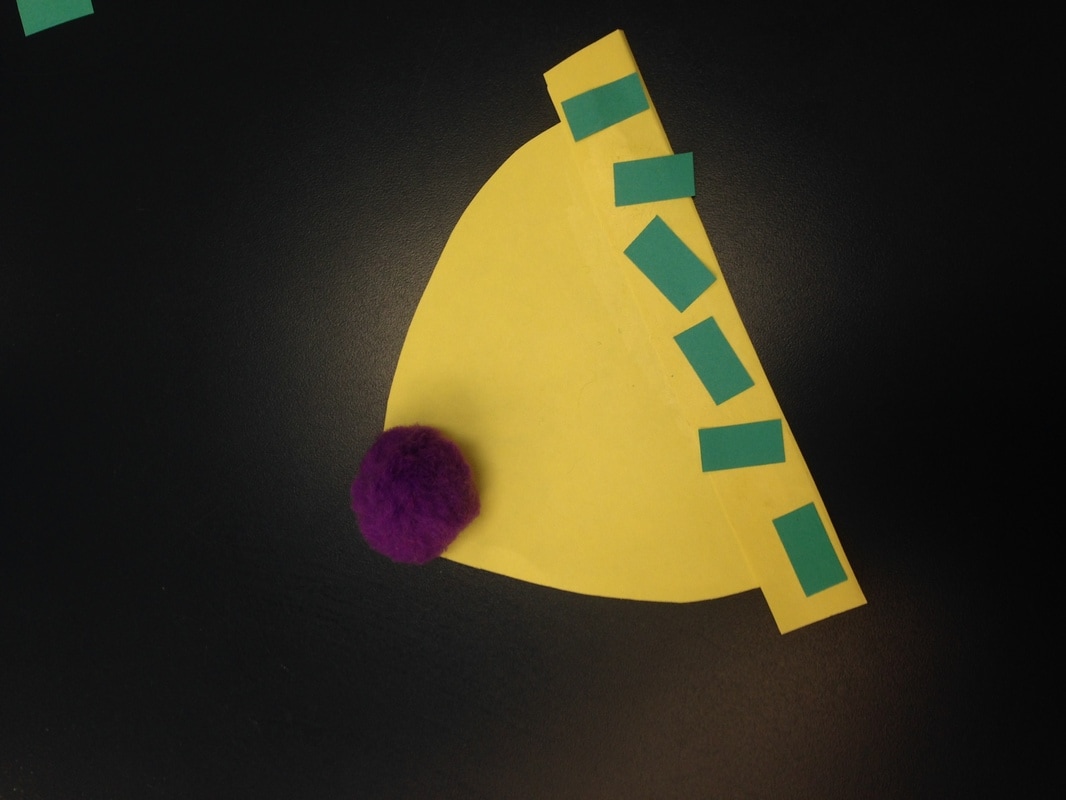
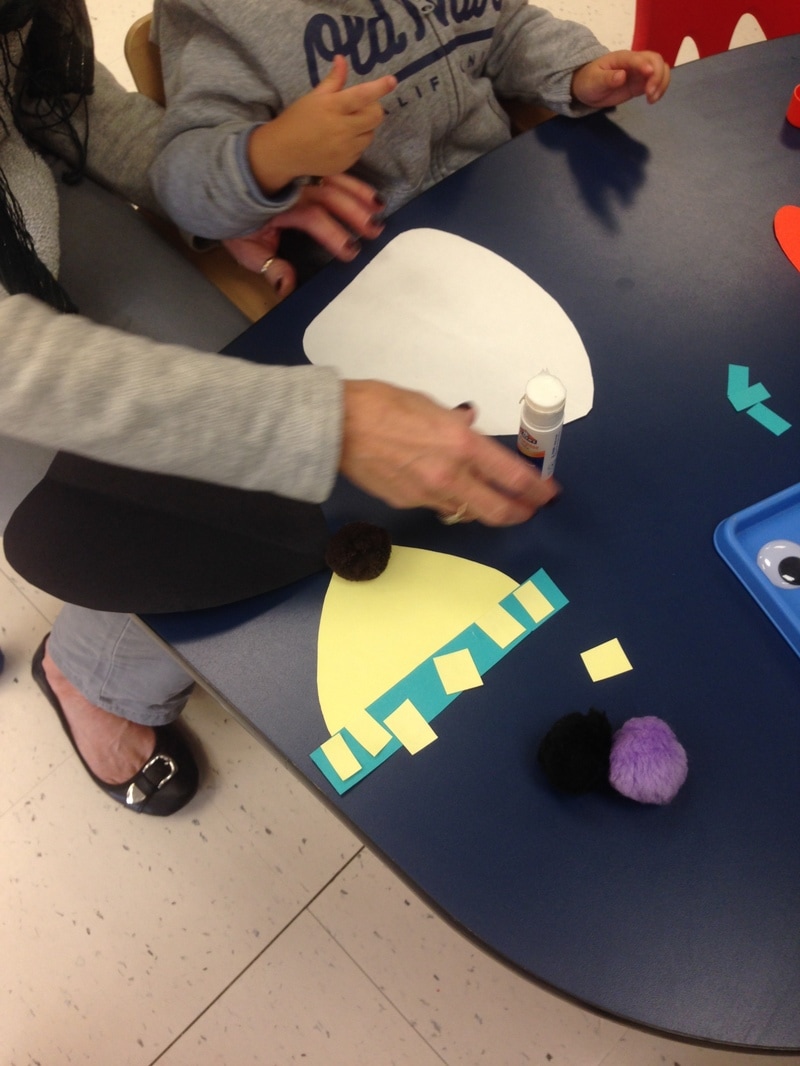
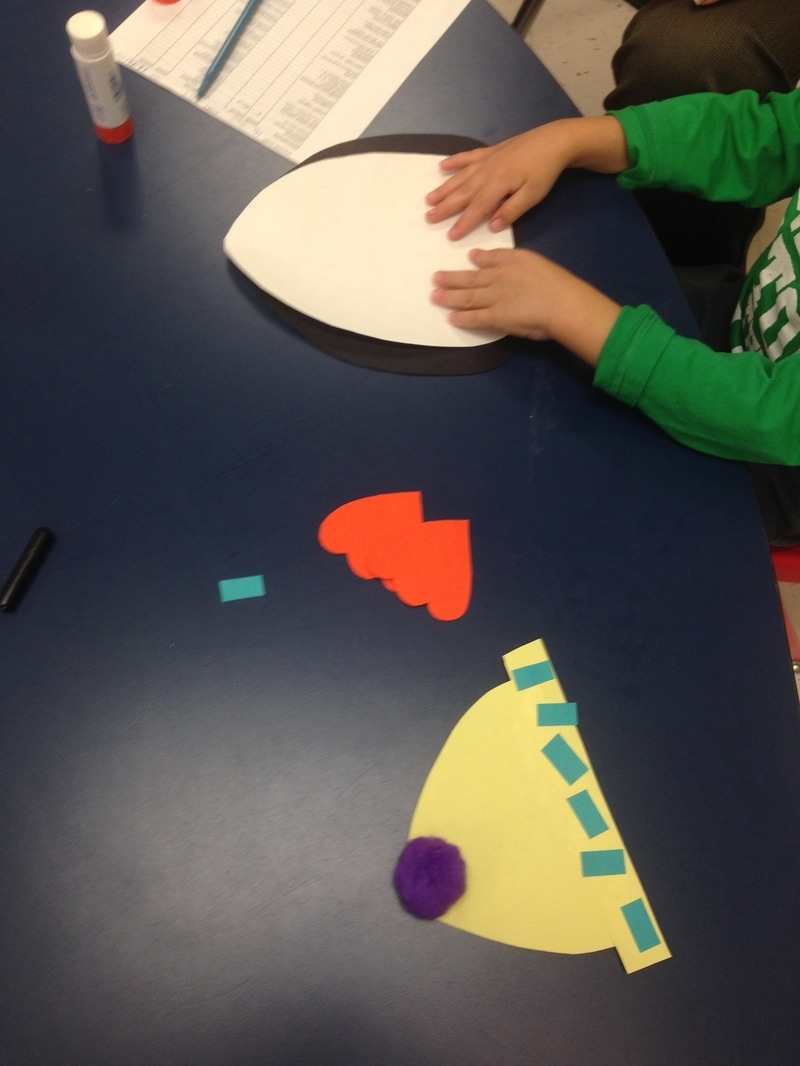
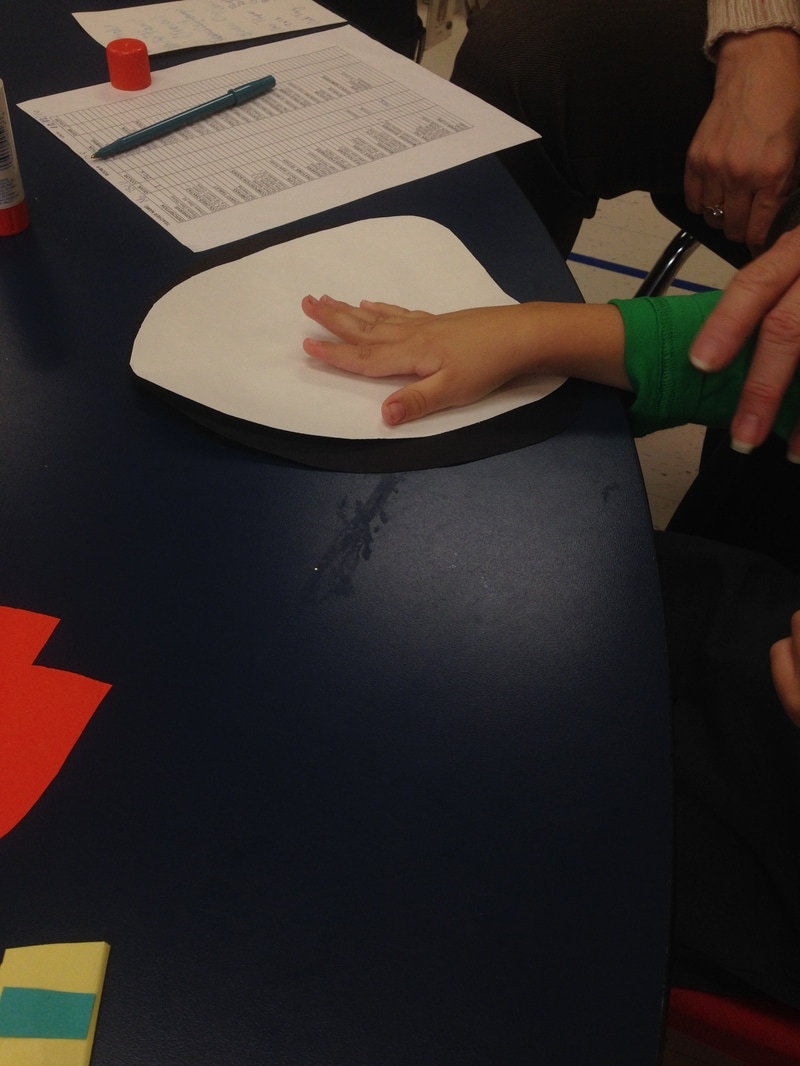
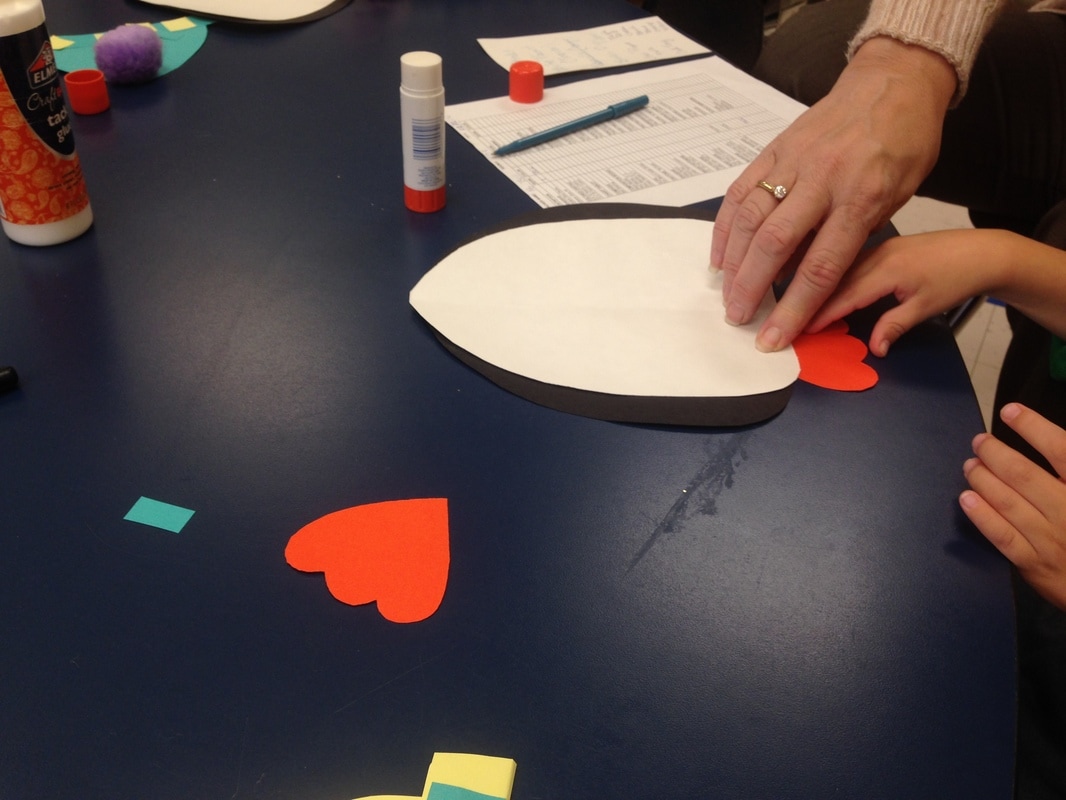
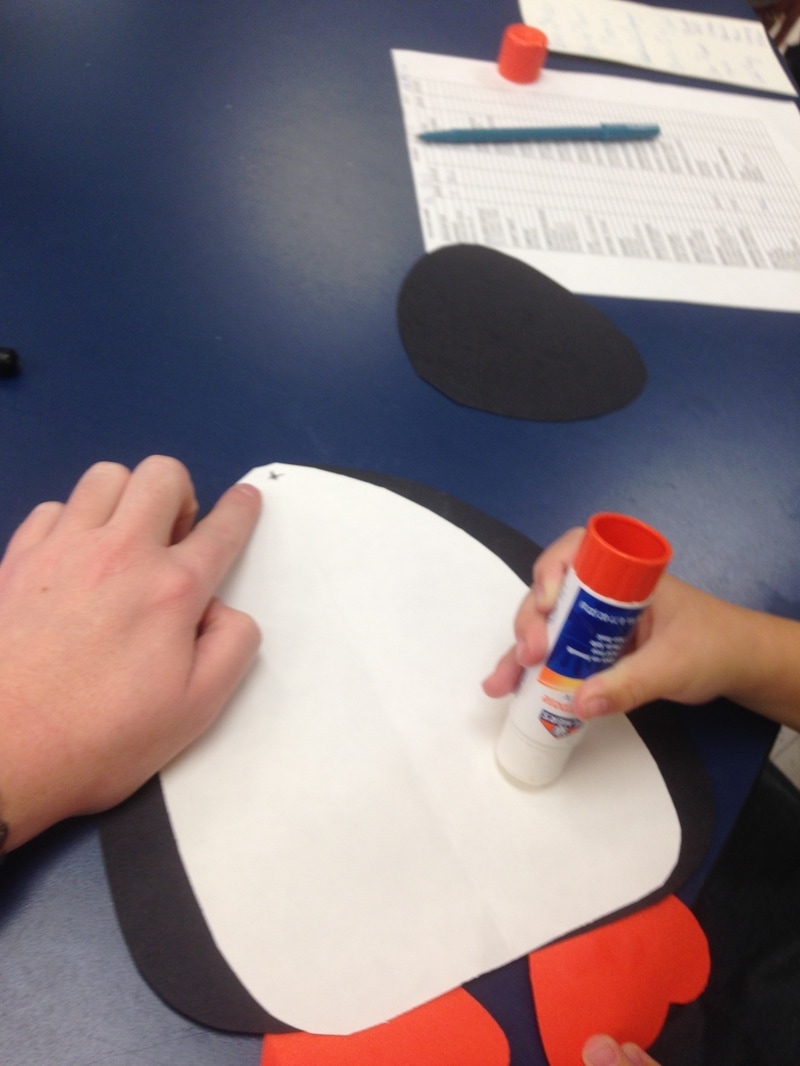
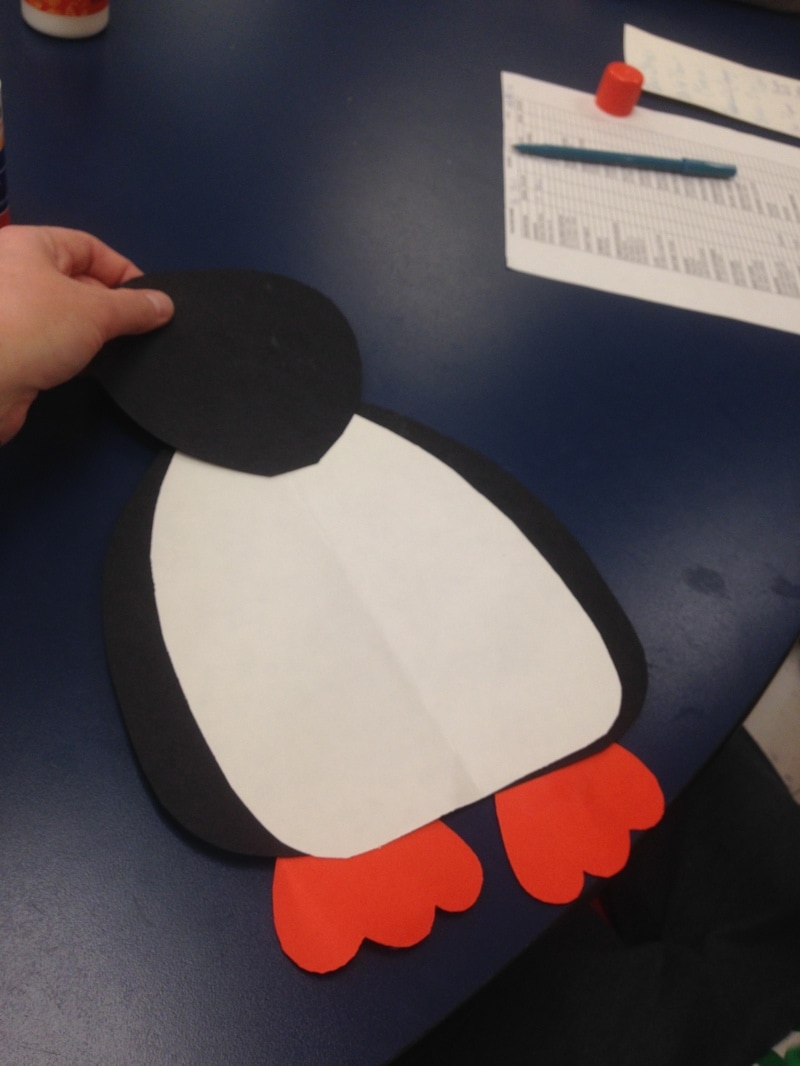
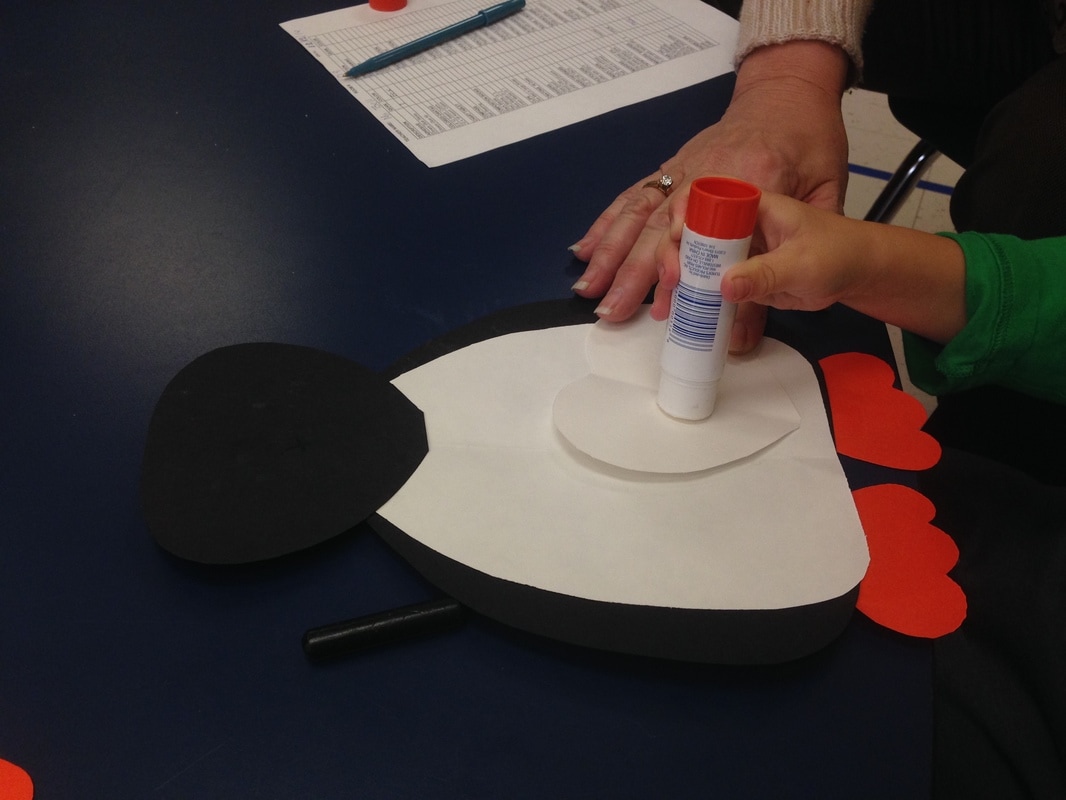
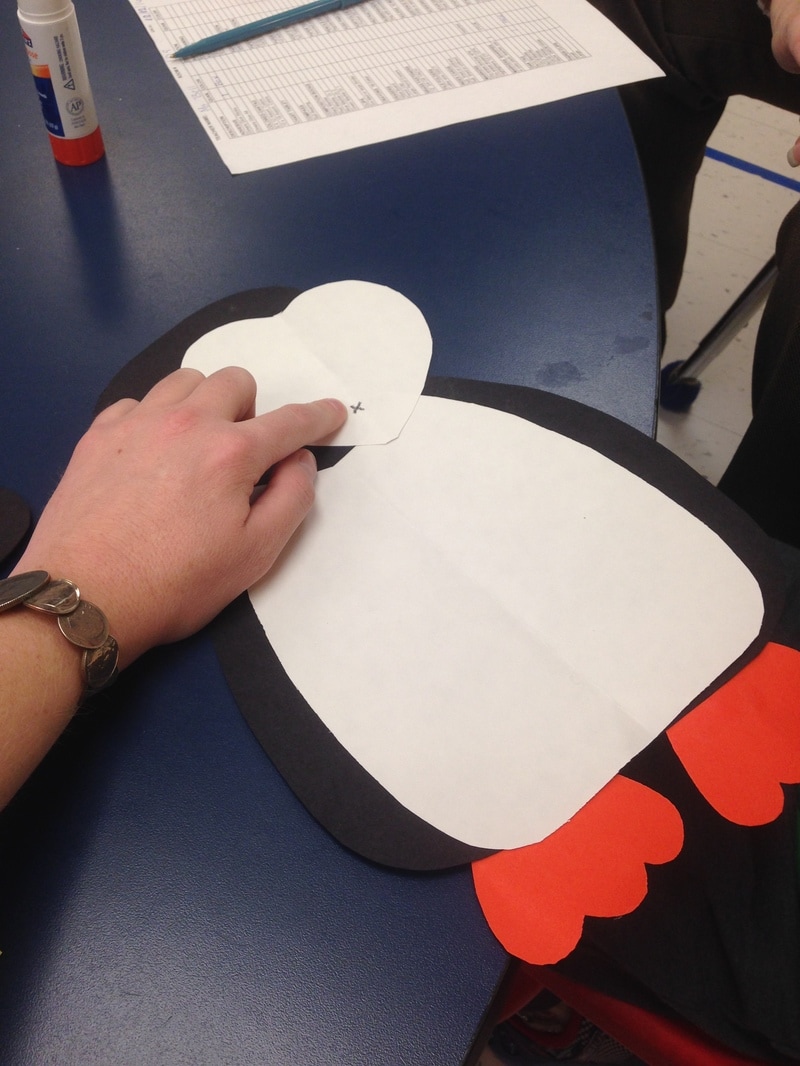
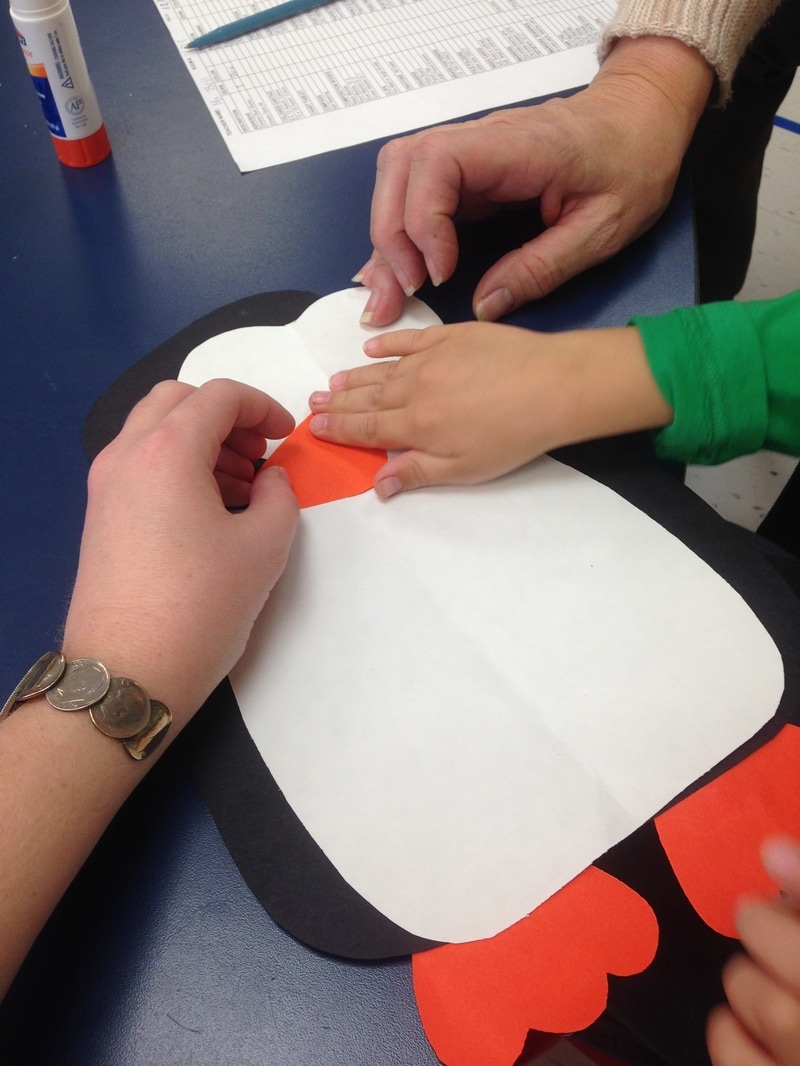
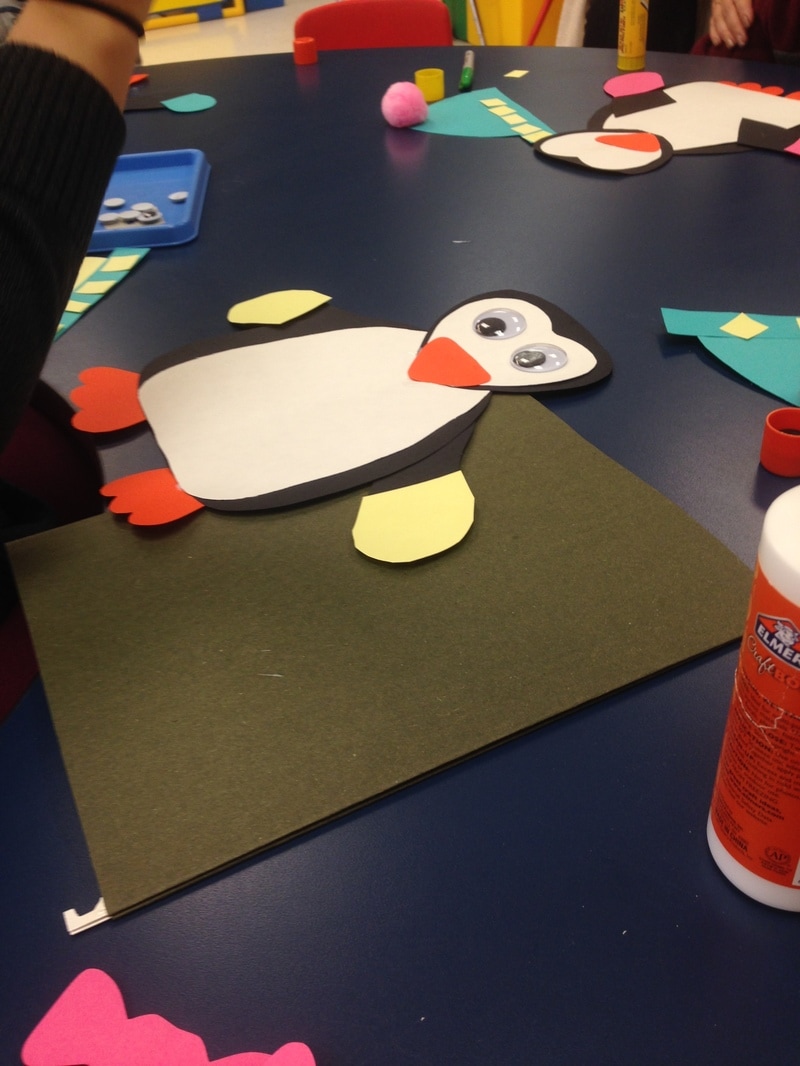
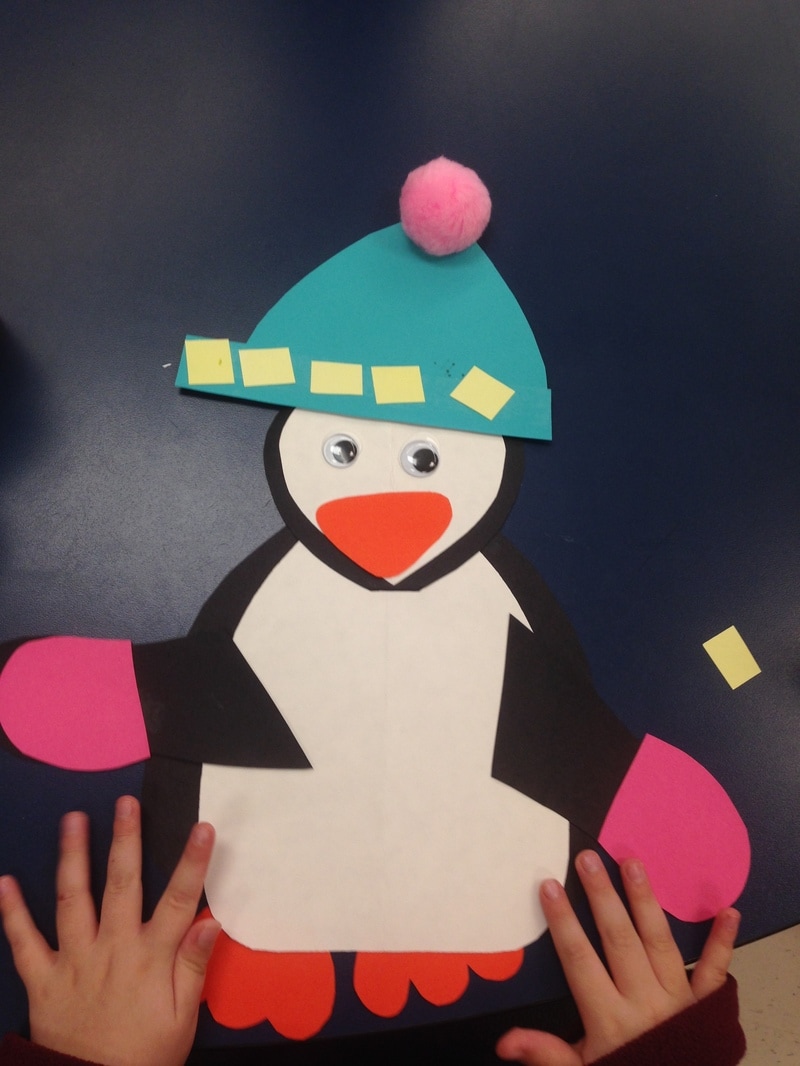
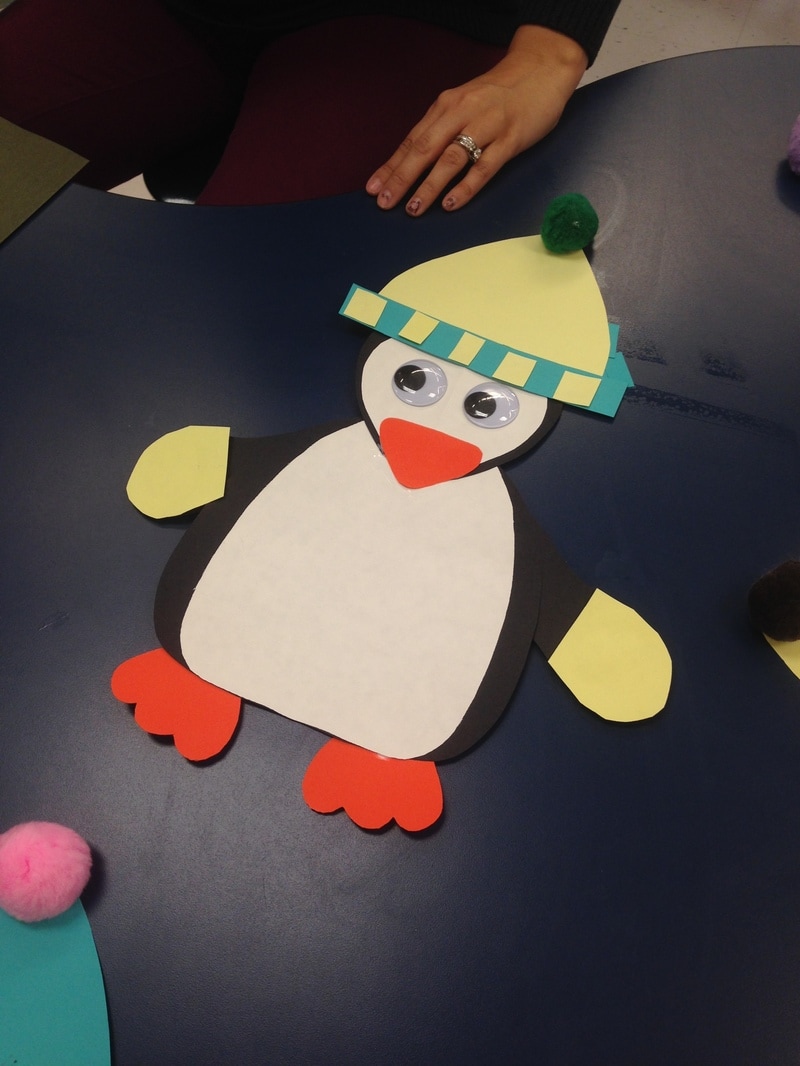
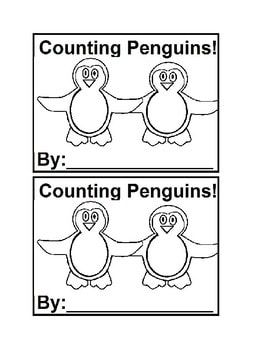
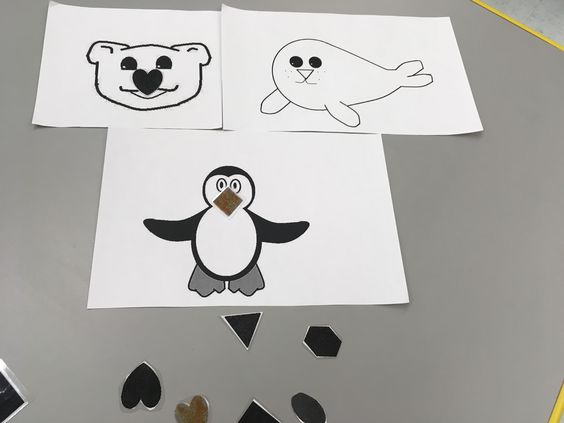
Step 1- Prep materials. Step 2- Students are given two or three choices of hat colors. Mark an 'X' and make a line with crayon on the top part of the hat. This helps students know where they need to glue and place the long rectangle to finish the hat. Step 3- Students are given little squares to glue onto the long rectangle on the bottom of the hat. Students can complete this independently are can be helped with hand over hand if needed to complete this step. Step 4- Students are then given large pom poms to place on top of the hat. Step 5- Students are given the penguin body. Mark another little x onto the body so students know where to glue, or let students glue the body independently. Then the students will place the tear drop white part of the body onto the penguins body. Step 6- Once the body is completed, students are given the feet to glue on the bottom of the body. An x can be placed in the spot that the glue needs to be. Step 7- Mark an x on the top of the white part of the body (see 3rd photo to the right where the finger is pointing to the x.) This is where the student needs to glue and place the face of the penguin. Step 8- An 'x' is marked on the back of the white part of the penguins face. The student will place glue on this spot on the white cut out and place it on the black part of the penguins face. Step 9- Place another x onto the white part of the face to your child or student to place the penguins peak onto. Once this is finished, the child can place googly-eyes onto the face. Step 10- The child will be given the option between two or three gloves of different colors. They will glue it onto their penguin along with the hat they completed earlier. Now your adorable penguin is complete and ready to be displayed! Please check out my blog soon for other winter activities and polar animal theme including more penguin activities. In the mean time, check out my Teacher Pay Teachers site for penguin and polar activities: -Arctic Animal Shape Match -Harp Seal Color Matching -Penguin Color Matching -Polar Bear Color Sorting -I See Penguins Color Emergent Reader Book in black and white & the same book in color. -Penguin Alphabet Matching -Penguin Q-Tip Art Freebie -Counting Penguins Emergent Reader in black and white & in color.
Thanks for reading my blog post. I Hope you and your students have fun creating this adorable penguin! Ms. Pre K
0 Comments
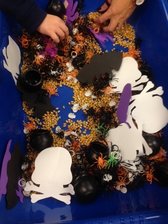
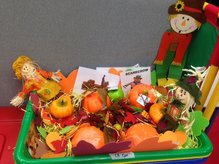 So I'm really behind in my blogging. It is definitely tough keeping up with everything at school, creating & prepping materials and then trying to write about them on the blog. That isn't including the balance of home life, gym, laundry (which is a never ending cycle) and some relaxation thrown in there. I really enjoyed all the fall activities we did this year. October was a fun mix of doing farm activities, going to a field trip to the farm, learning about feelings, Halloween and then our 'fall finale'. Here is the break down of most of our activities: -Fall and Halloween Sensory Bins: Inside the fall sensory bin was pumpkins, apples, felt or silk leaves, laminated print words (words and photos of items like hay, hay bales, scarecrows, leaves, pumpkins, etc.), scarecrows, yellow grass saved from Easter baskets to look like hay. *Inside the Halloween sensory bean is corn, foam skeletons, bats, insects, spiders and various creepy crawlers I bought at The Dollar Tree. Also found these cute cauldrons on sale at Rite Aid.
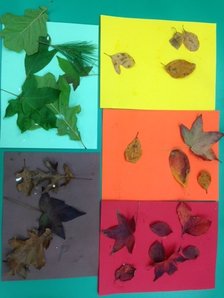
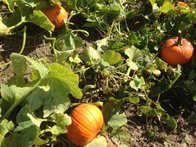
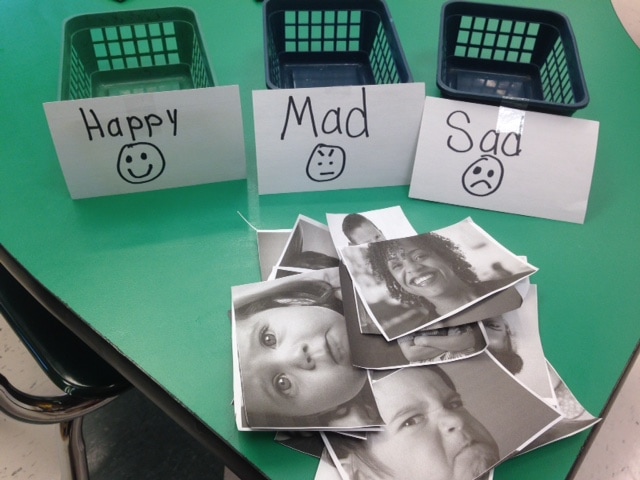
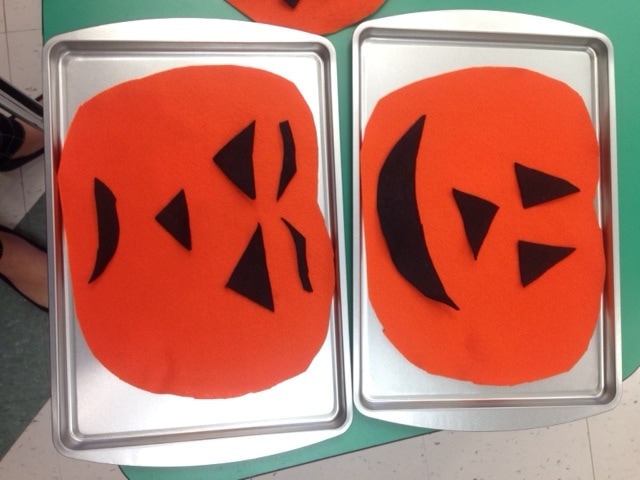
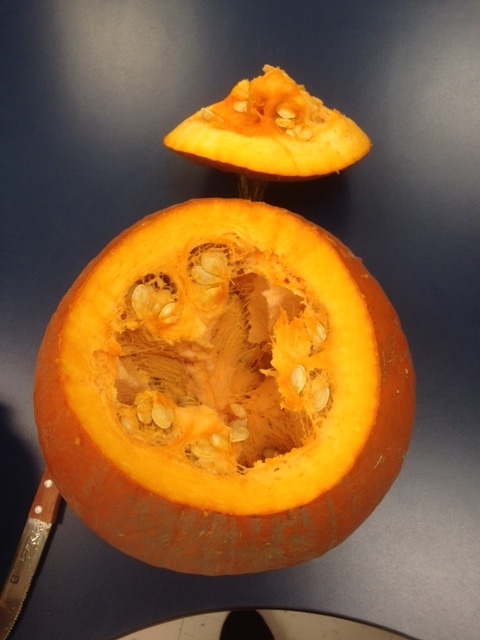
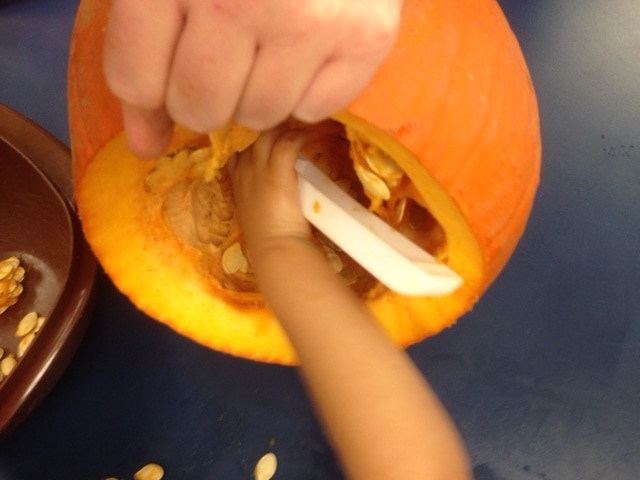
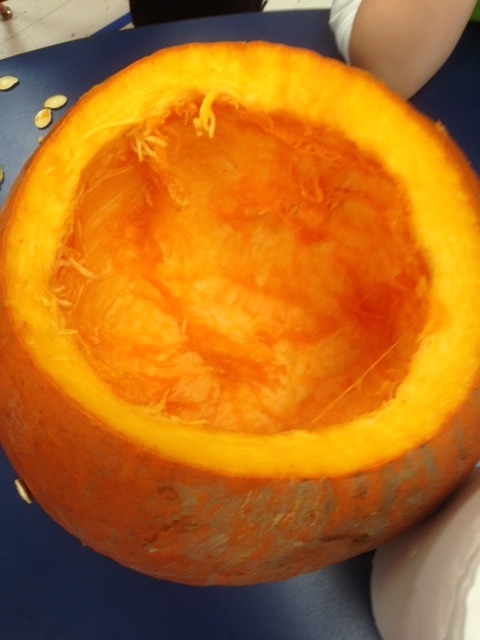
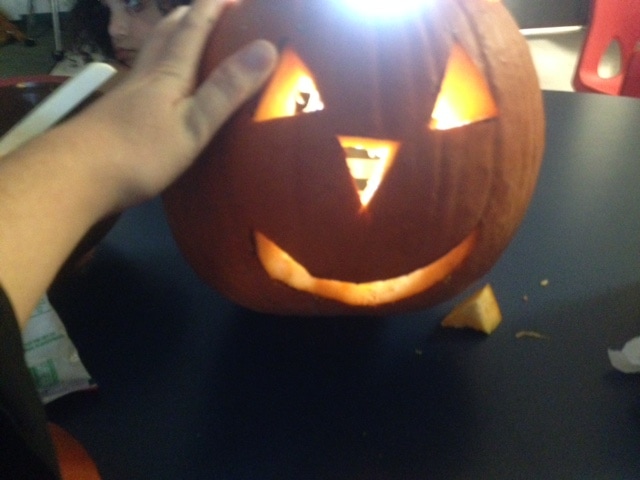
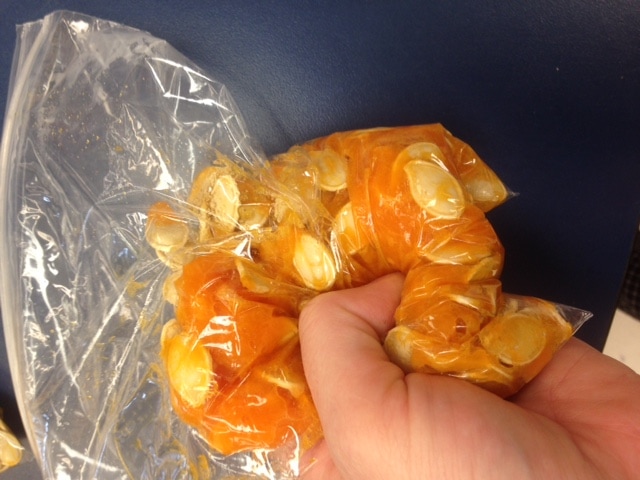
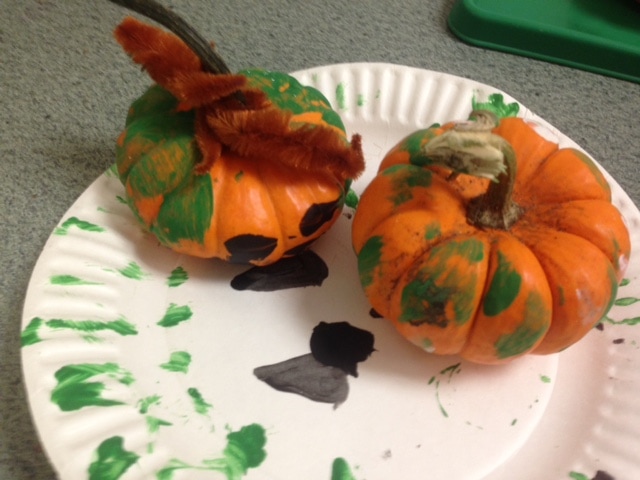
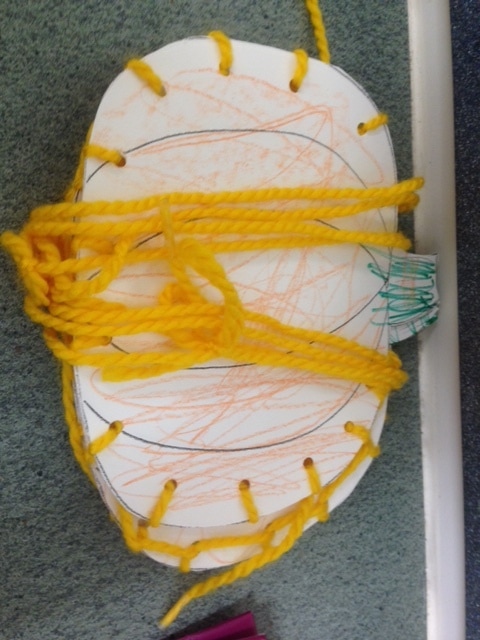
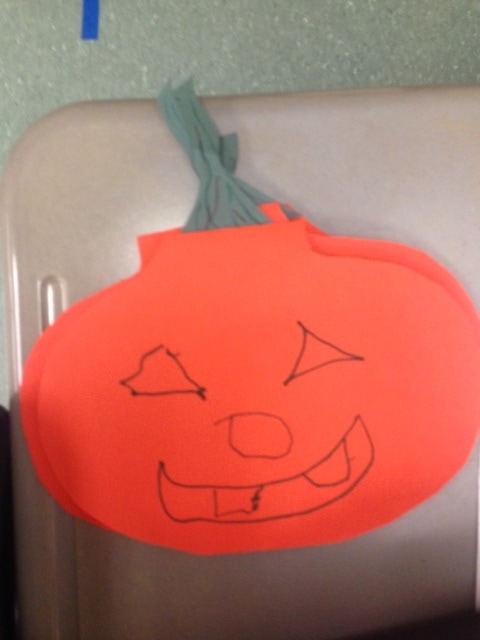
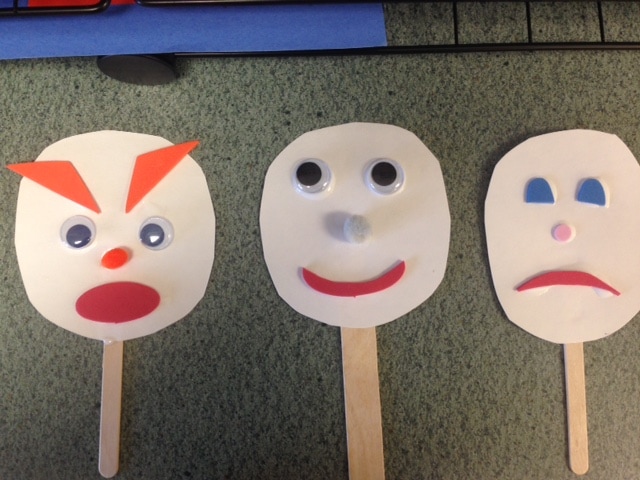
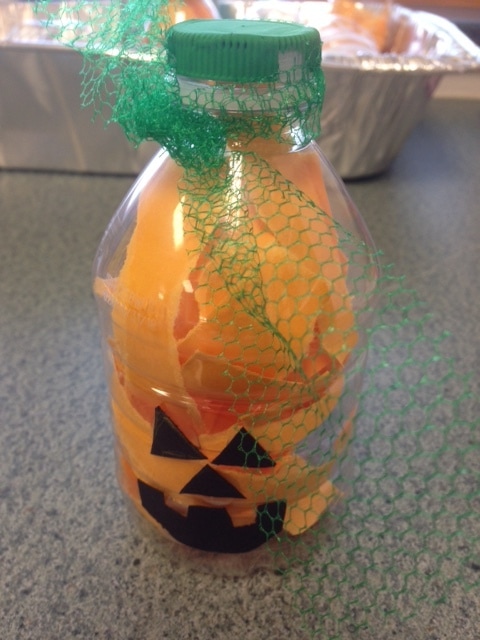
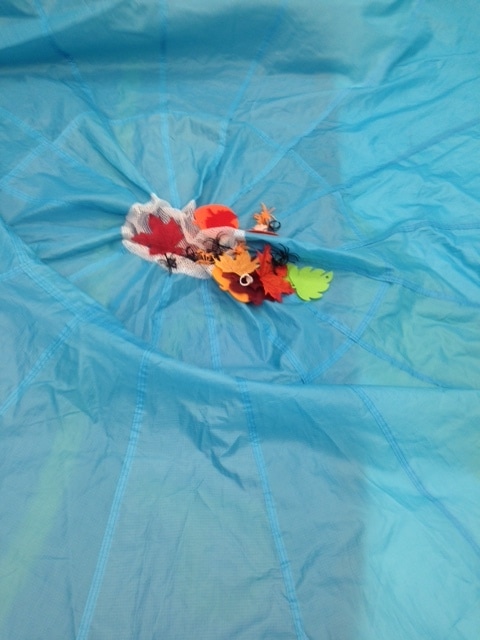
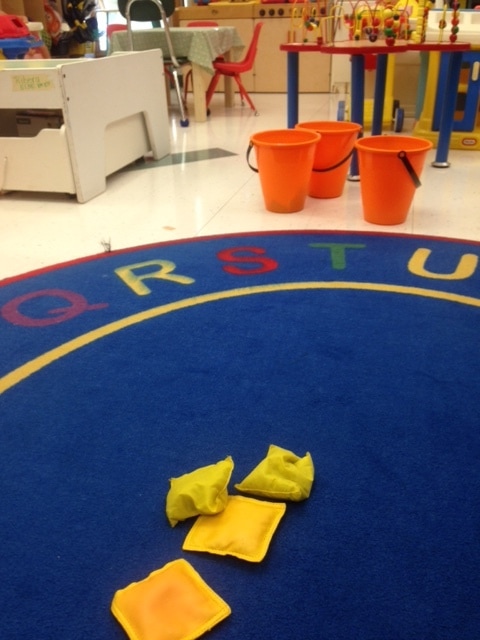
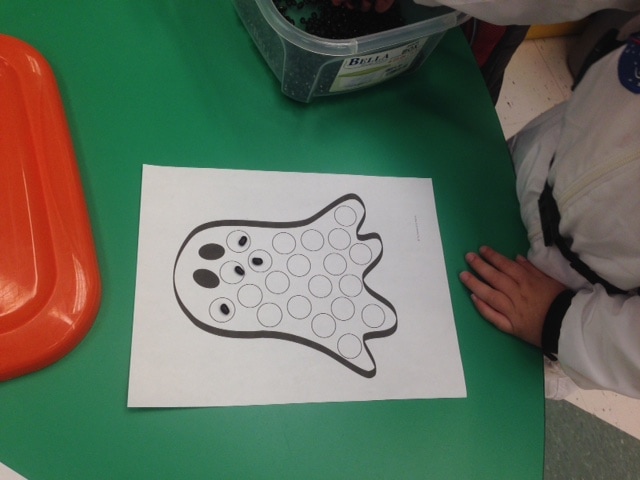
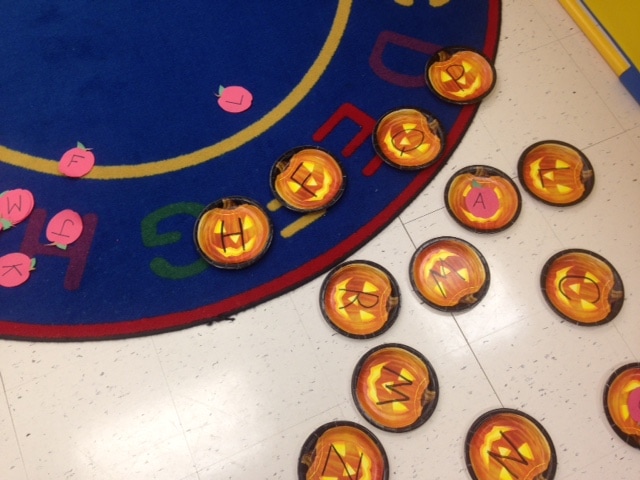
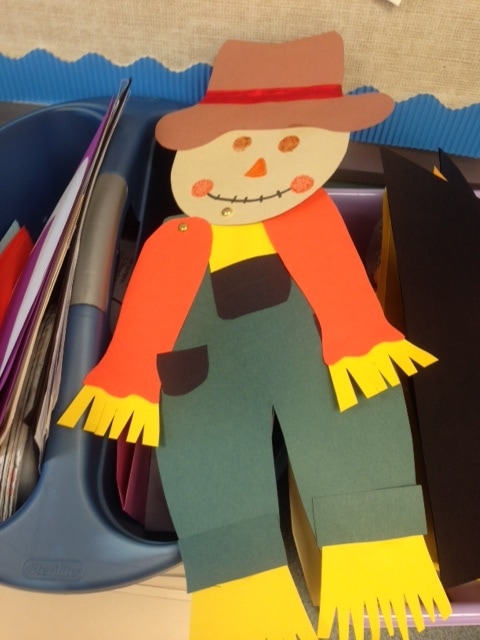
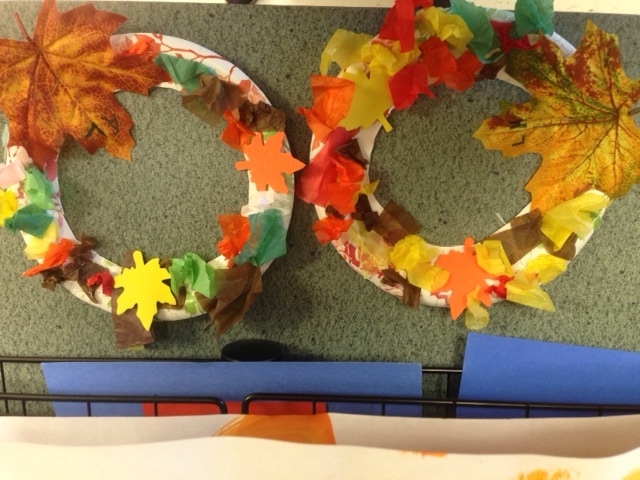
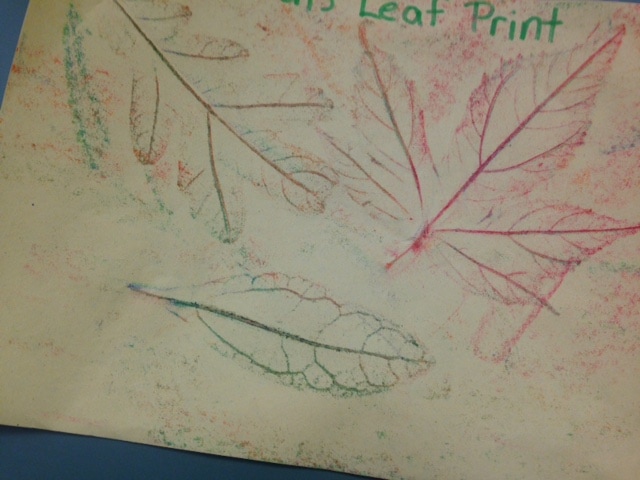
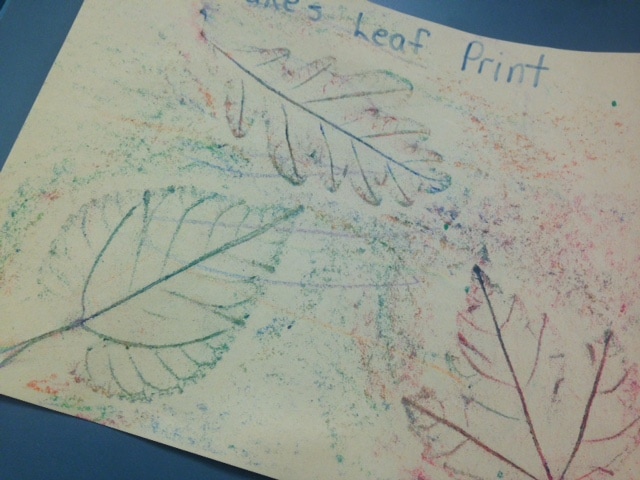
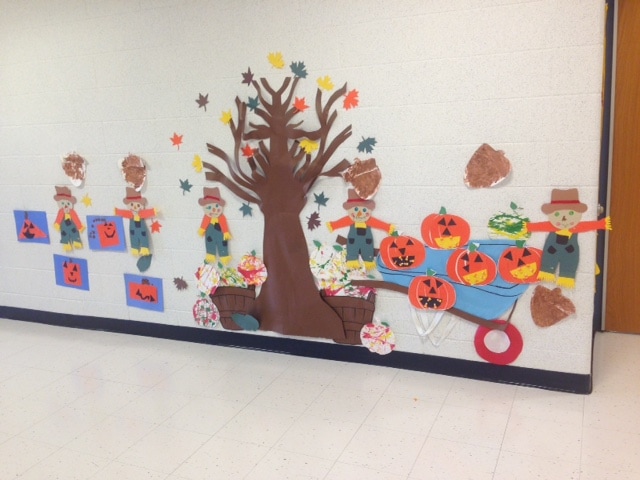
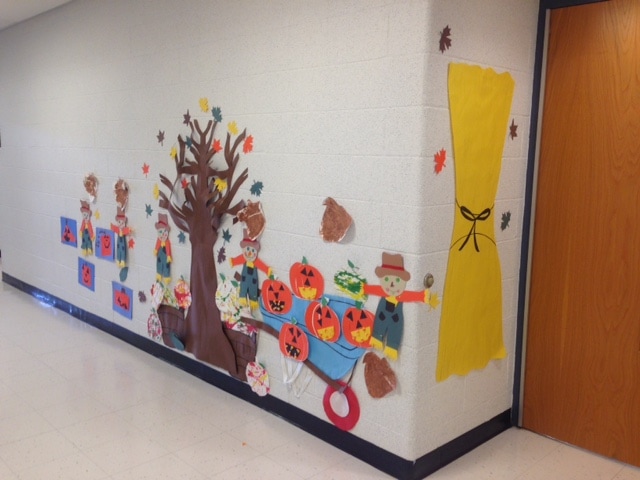
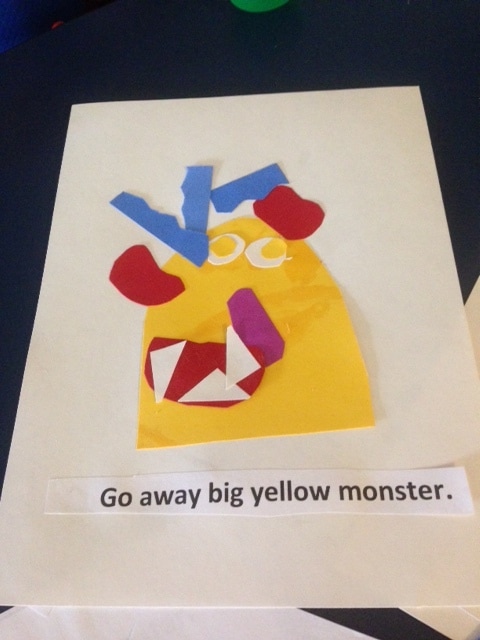
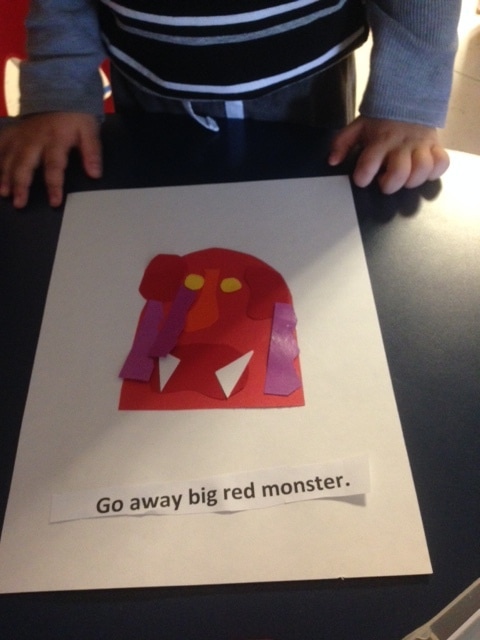
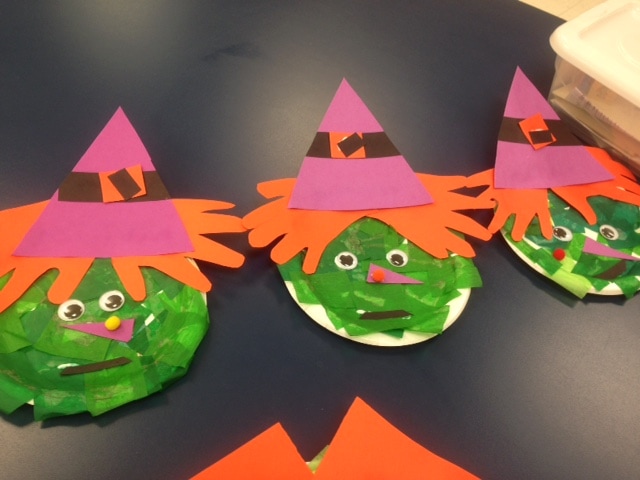
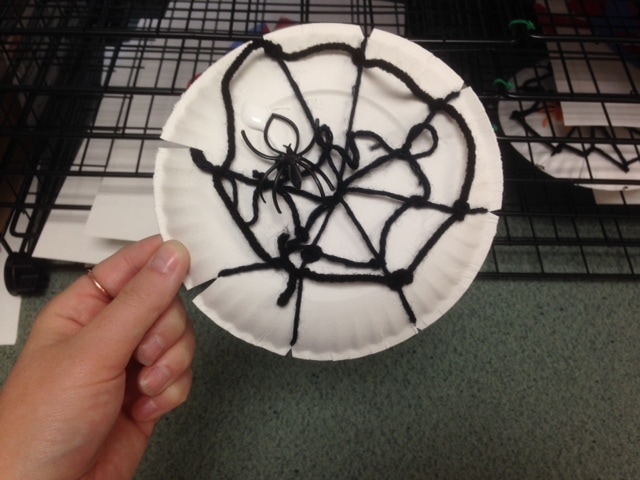
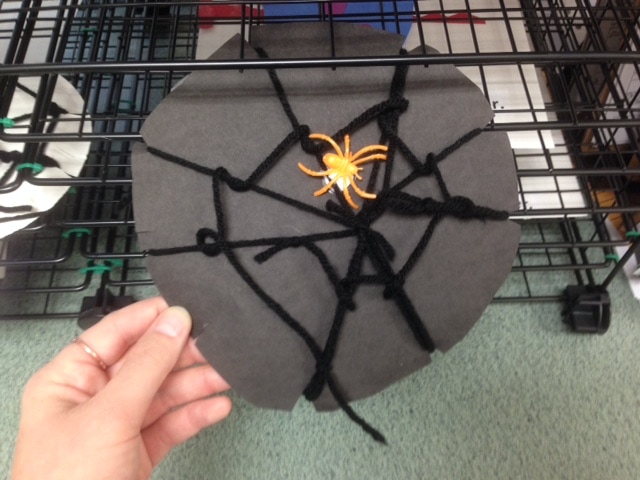
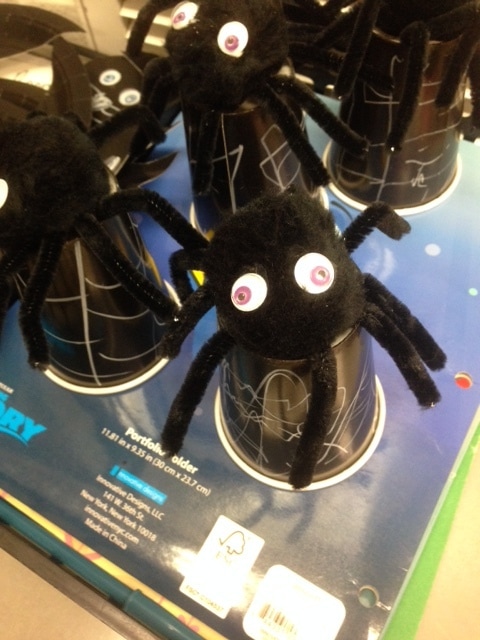
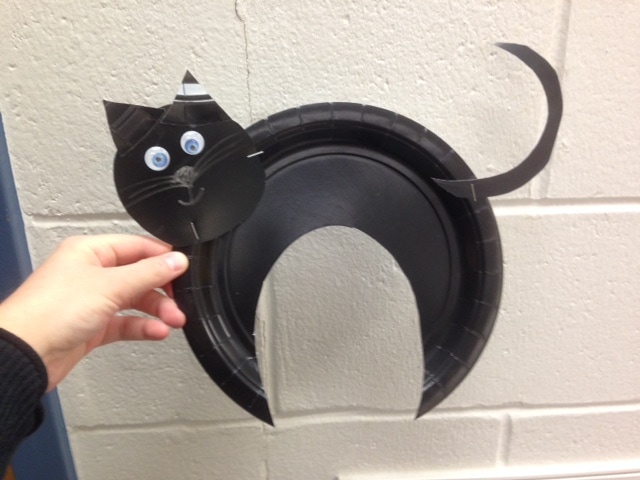
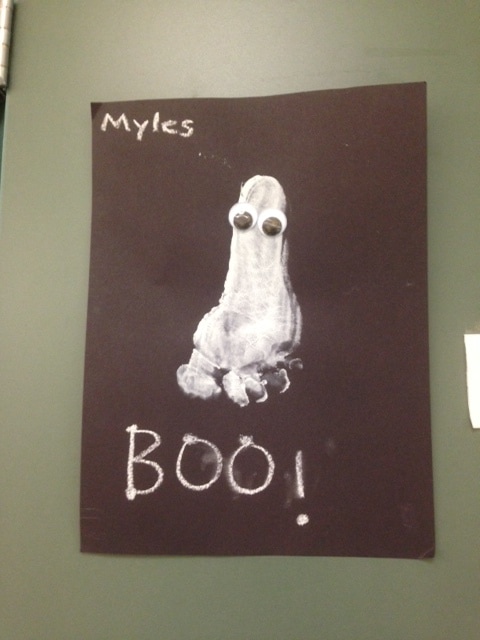
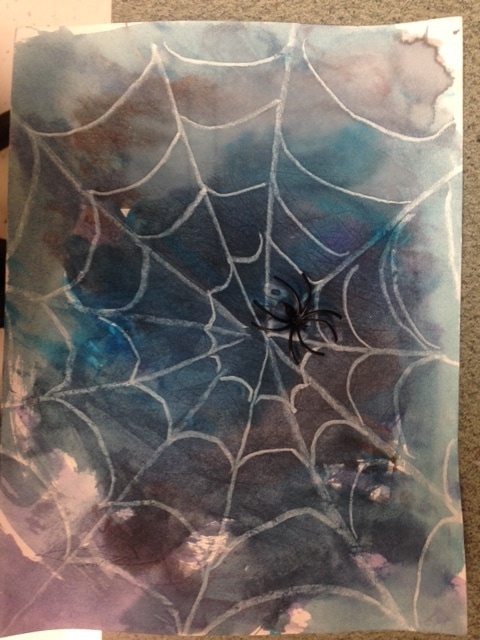
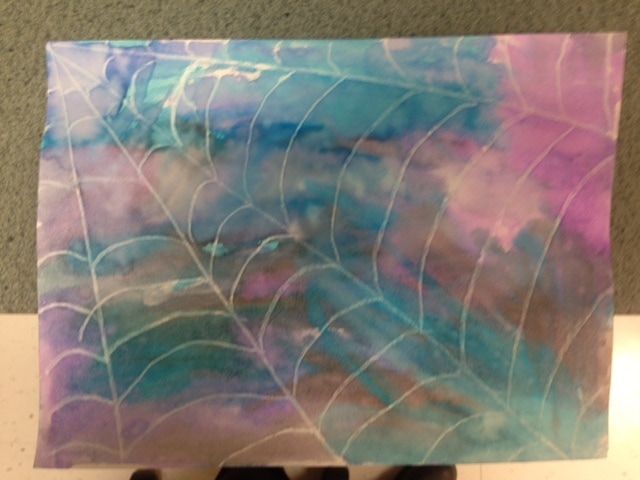
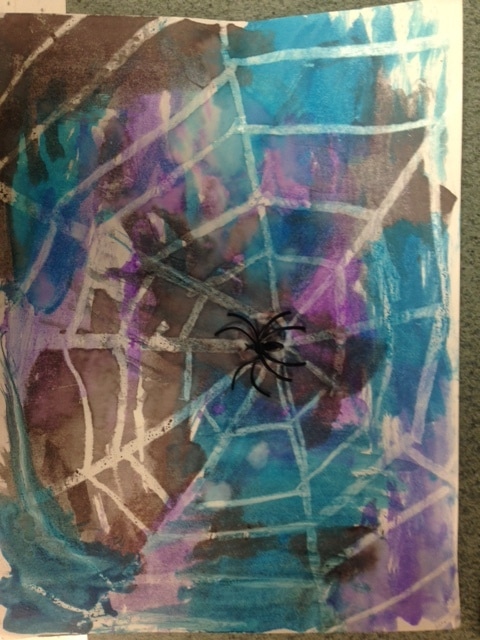
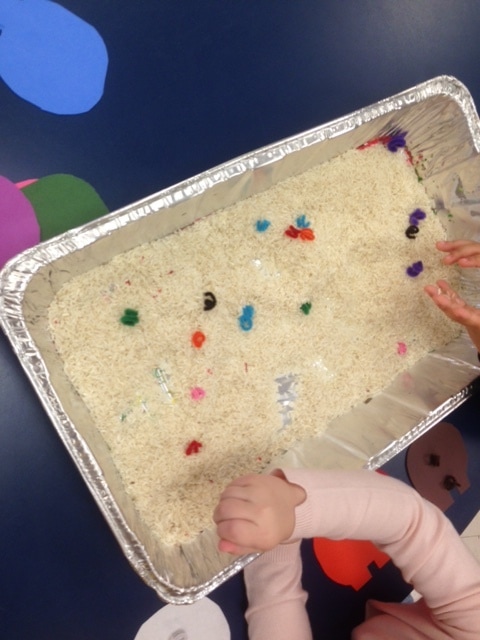
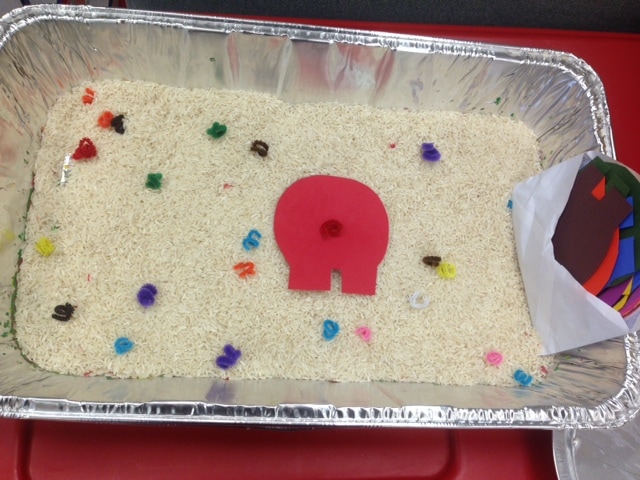
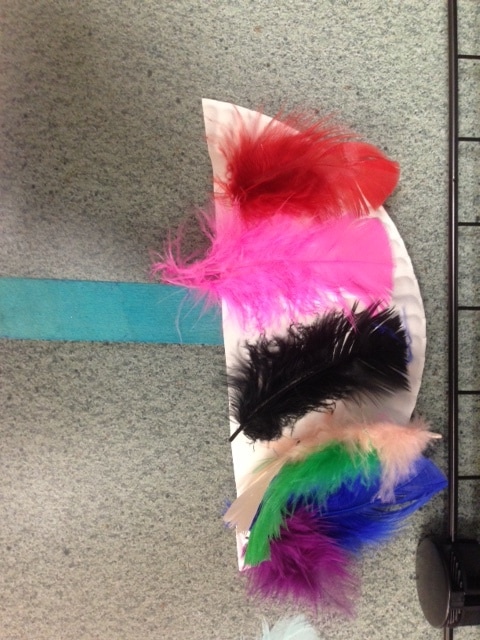
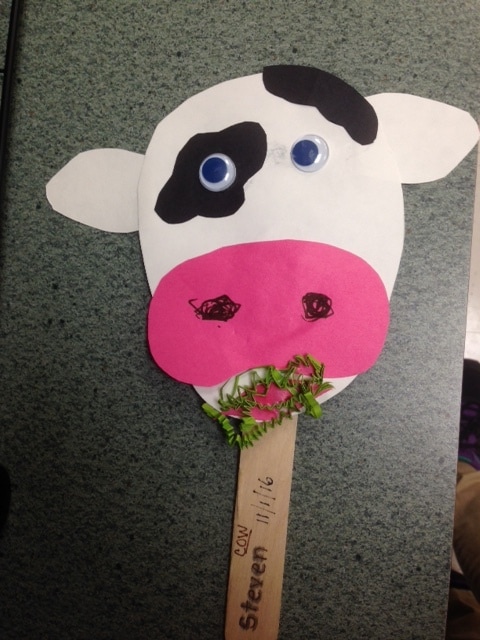
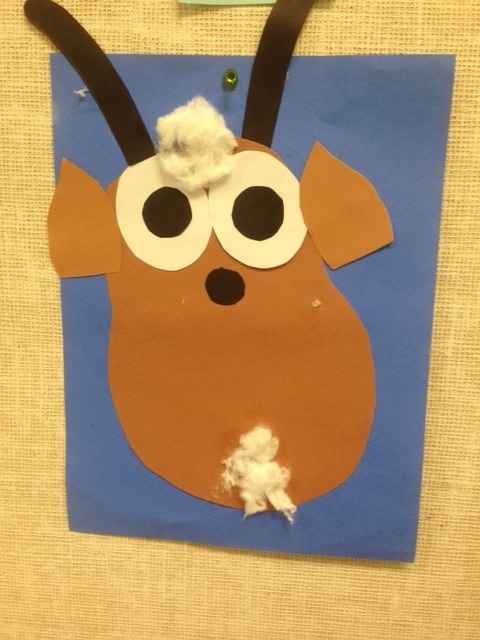
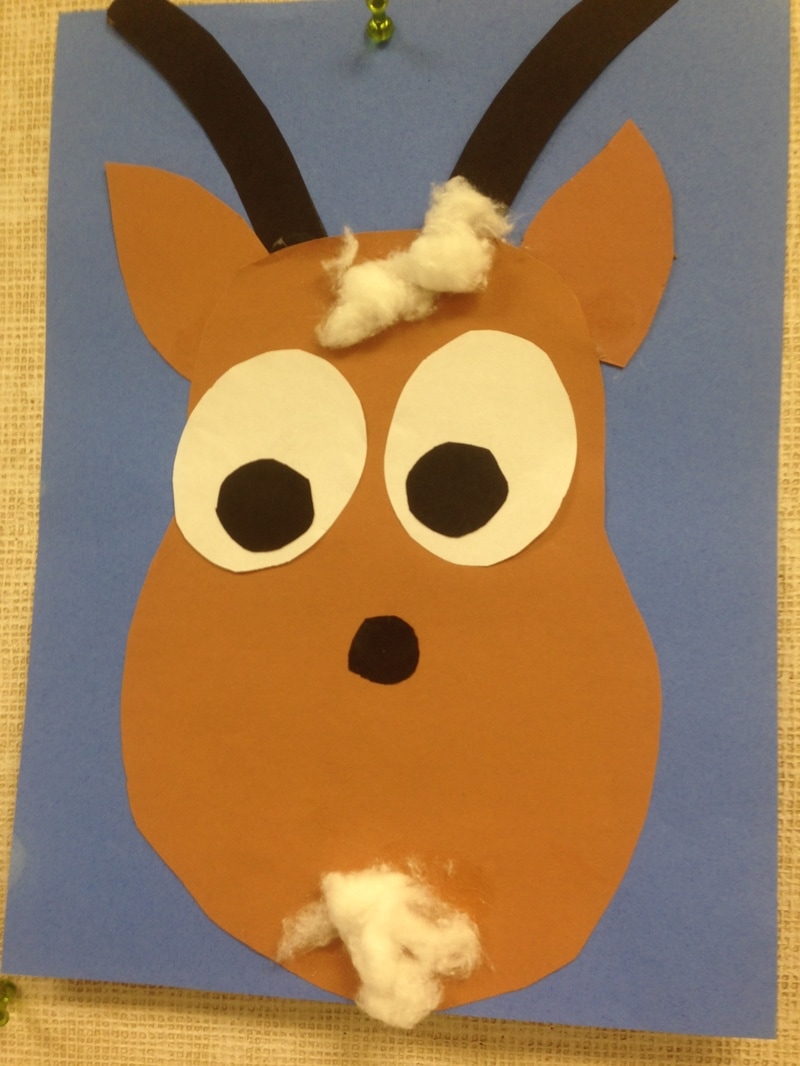
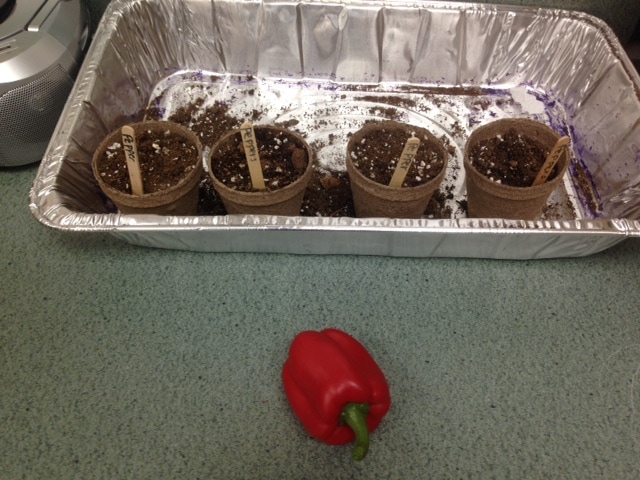
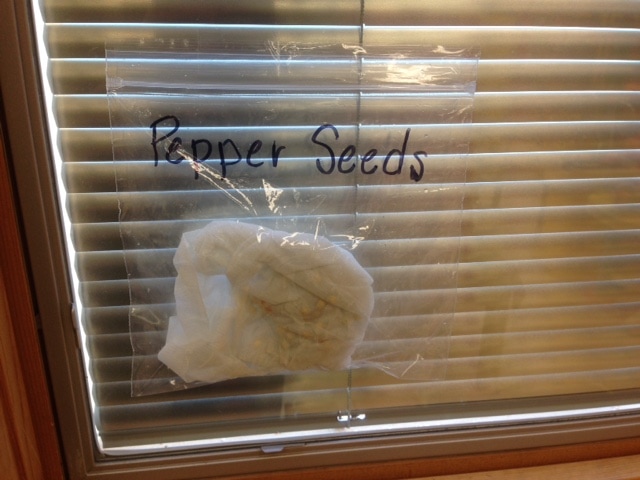
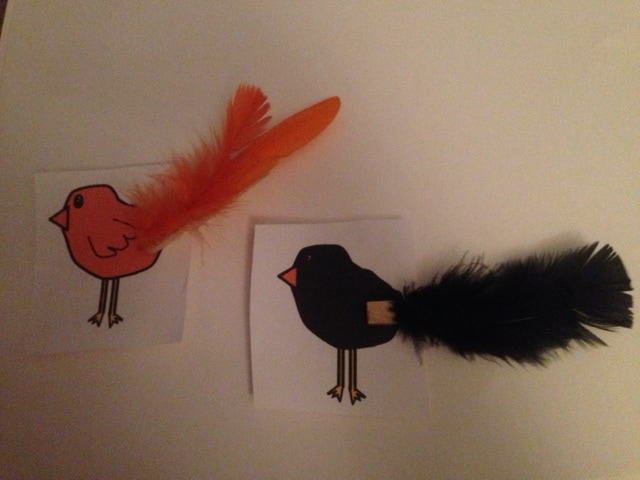
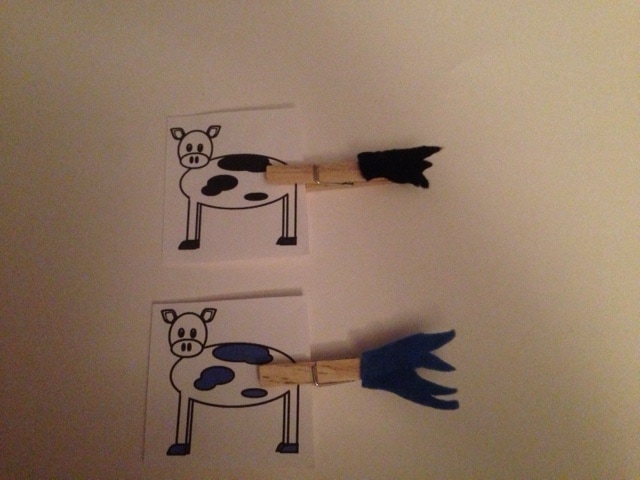
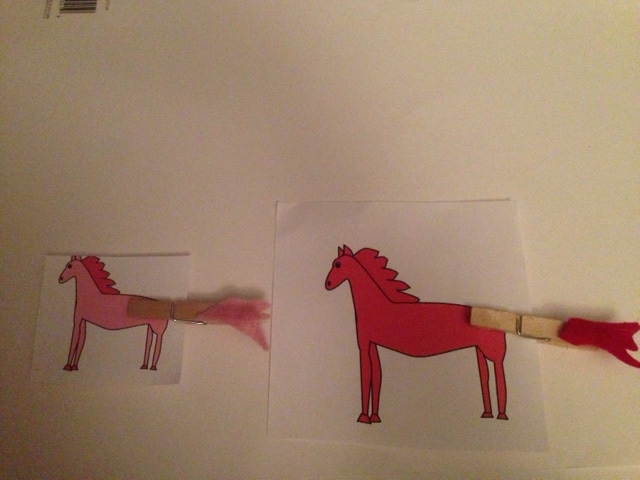
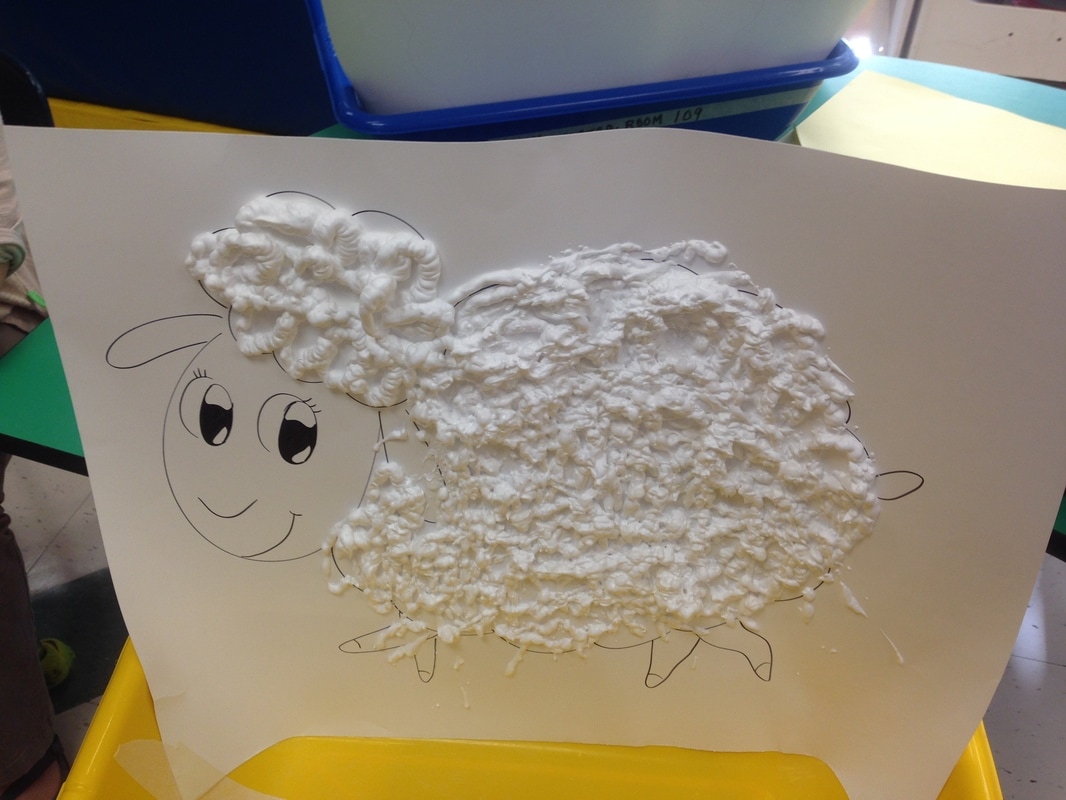
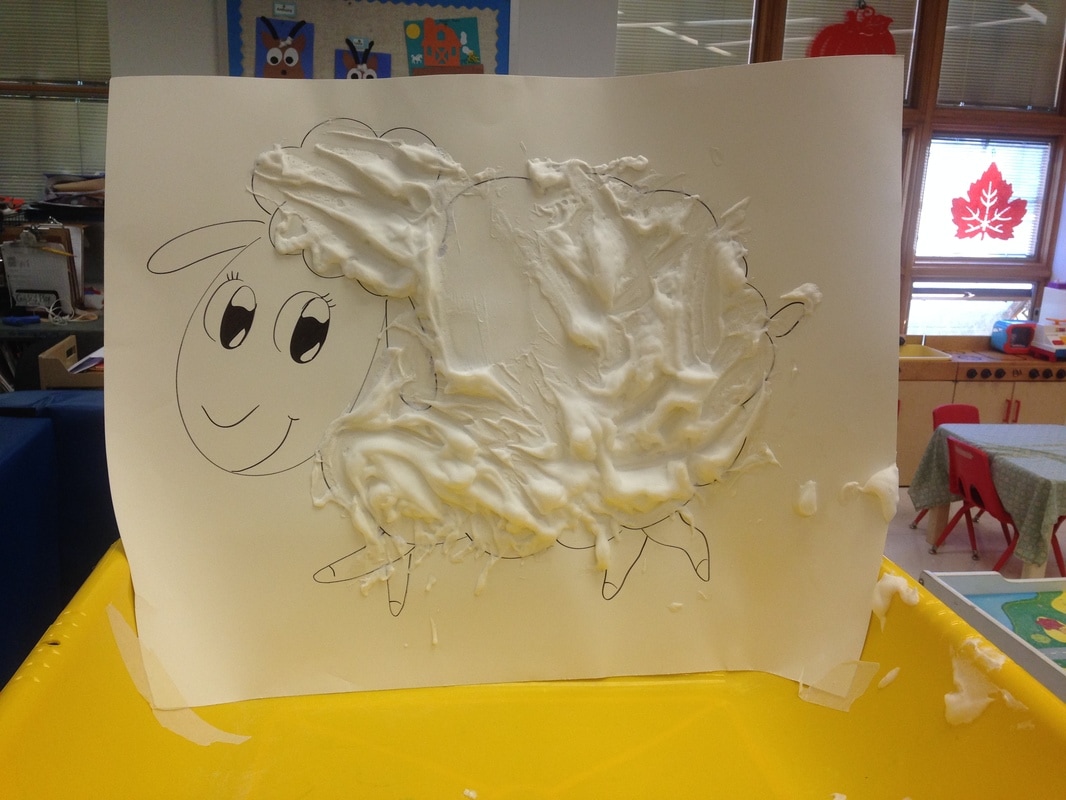
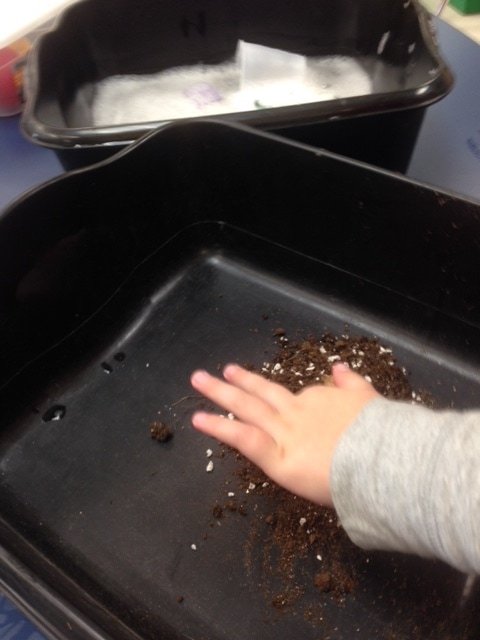
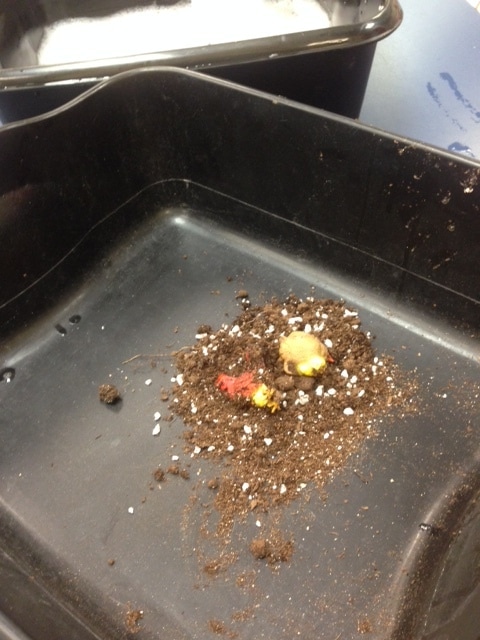
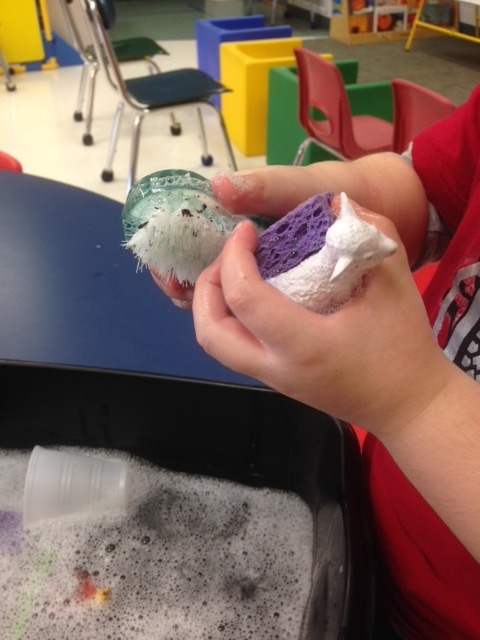
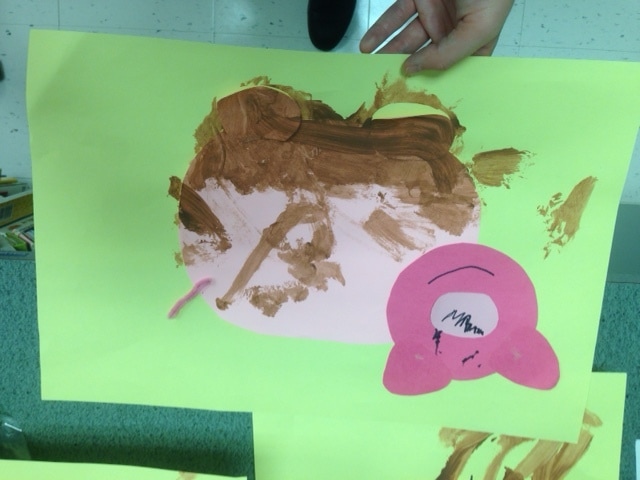
.-We did pumpkin lacing cards (see photo below): We used card stock to hole punch holes along the edge of the pumpkin. Then we cut enough yarn to lace through the pumpkin. Each student was able to lace each pumpkin more than once. -We carved a Jack-O-Lantern. The students took turns scooping out the pumpkin insides (which made a fun sensory bag after!). To connect with our Feelings unit, the students picked they wanted a happy pumpkin. We used a flash light inside our pumpkin to illuminate it’s face. We also tried cooked pumpkin seeds! We did a follow up activity the next day with 'What's Inside a Pumpkin?' where the students glued cut up pieces of orange yarn and pumpkin seeds. (see photos below) -We were learning about feelings-happy, sad and mad. We sorted then. Next we made Jack-O-Lanterns with felt and made our pumpkins look happy, sad or mad to connect with our pumpkin carving activity. (see photos below). -Emergent Reader books: Emergent Reader Book pumpkin seed counting & pumpkin counting (in color or black & white) and squirrel colors & squirrel acorn counting -Pumpkins Activities: We were able to do follow up activities to work on counting, shape, colors, letters and numbers while matching and sorting. Find them here- Counting activity, shape activity, Pumpkin matching with shapes, colors letters & numbers. -Squirrel Activities: More fall activities found here- Shape Matching, Five Little Acorns Freebie, letter matching , Grey Squirrel song freebie -Tree activities: More fall activities found here for color sorting and matching with Tree Mats for color sorting, acorn counting , leaf salt water color art craft freebie -We did pretend pumpkin and apple picking: we used paper plates with pumpkins on them and wrote each letter onto each plate. Then we had apples with each letter on it. Students had to 'pick' the apples and match it to the pumpkins in the 'pumpkin patch'. -'Pumpkin' Toss: Bean bag tossing into buckets with orange bean bags. -Parachute fun with spiders, leaves and other fall items. Once they popped out of the parachute we took turns putting them back onto the parachute. But first we needed to identify what it was or it’s color! -Pumpkin Painting: mini pumpkins and open ended painting. -Water Bottle Pumpkin craft: Fine motor activity filling up a pumpkin with cut up tissue paper -Pumpkin Puzzle: cutting up the pumpkin pieces and then gluing them onto paper. -Feeling puppets: the students picked a feeling and used felt pieces to create the puppets on Popsicle sticks. -Do-a-dot fall activity: students used the freebie do-a-dot sheets and used black beans to place onto each circle. (Get freebie on The Resourceful Mama) Spooky Walk- We used a CD that had the Spooky Walk on it. It is similar to 'We Are Going On A Bear Hunt' but it is going on a spooky walk instead. The students loved this! We also watched videos of "Dem Bones" and "Five Little Pumpkins" on Youtube. We read "The Little Old Lady Who Wasn't Afraid of Anything" and used musical instruments for each sound (the pants, hat, etc). -A is for acorn: We cut out the lower case letter a with brown construction paper. Students followed directions while following the model. We wrote in "a is for acorn" after. -Scarecrow: Students completed this activity during two work sessions. Students work on cutting out the pieces first and then the next session putting the scarecrow together with brads. -Leaf wreath: This was an open-ended activity for students to use foam and silk leaves to glue onto a pre-cut out wreath made from a paper plate. -Leaf rubbing: Students picked different leaves and put onto the table. Then we took a piece of paper, taped it down, and used a crayon with the paper pulled off and rubbed it over the leaves to create leaf rubbings. -"Spookly the Square Pumpkin" activity: If you look at our classroom display, you'll notice shape pumpkins. We listened to "Spookly The Square Pumpkin" on video and then did a follow up craft. Each student picked a shape and then created their shape pumpkins with pre-cut out shapes and do-a-dot markers. -Go Away Big ____ Monster: I printed up the phrase with different colors "Go Away Big __ Monster" after reading the story. Each student picked a color and then created their own monster with pre-cut materials. If students needed extra help where to place items, we would place an 'x' where they needed to add glue and/or the pre-cut materials. -Fine motor witch: Using a paper plate as the face, students glued on pre-cut green tissue paper onto the face. The students used other pre-cut pieces to create the rest of the materials. -Lacing Web: Using a small paper plate, or a black piece of construction paper, we cut slits into them. Then the students wound black string around the paper and/or plate to create a web. -Spider: Students used glue, large black pom pom, googly eyes, black cup and a silver marker pen to create the spider activity. Students followed a model made by one of the paraprofessionals. -Black Cat: Using a black paper plate, cut out a C shape or crescent shape. Use the material cut out of the plate to make the face and triangles for ears. Use construction paper to cut out a curved tail. Use model when doing activity with your students and googly eyes. -Ghost: Paint your students foot with white paint. Press foot onto black construction paper. Then glue on eye balls and use white crayon or chalk to write "Boo!" -Water color Web: Use a white crayon to draw a web on a white piece of paper. Then use water color paint to paint over the paper. The wax with bead off the water color to show the web that was drawn. We used the colors black, purple and blue. Then we glued on a spider onto the paper once it dried. Also, find a freebie of spider size sorting here & a spider counting activity here. - We enjoyed singing songs like "Old MacDonald", "Farmer & The Dell" & "BINGO". We also read some stories that followed up with these songs. -Sensory Pig Tail Sort: I found this on Pinterest and was trying to find the link to share as my inspiration. (If someone finds the link, please post it in the comments so I can edit & add it on here. ) We cut up little pipe cleaners and then twirled them to look like pig tails. We cut up multiple pig tails for each color and put them into rice. We cut out a pig behind -Feather Fan: We were working on the Letter F for farm. Using Popsicle stick and a paper plate cut in half, students were able to decorate with feathers to create a fan. -Cow Puppet: We used green crinkly grass material that people used in Easter Baskets to look like grass in the cows mouth. We used pre-cut construction paper, googly eyes, Popsicle stick, black crayon and glue to create this craft. -Goat Craft: Inspiration found here! We used pre-cut out pieces of construction paper and cotton balls. - Milking cow activity: We made chocolate milk by milking a cow with a latex free glove (after washing it & putting a tiny hole into it) into a glove. We wrapped up a box with paper and made it look like a cow. Inspiration found here. -Pepper activities: Freebie recipe of Pepper Lantern. We used the seeds to germinate with a sandwich bag and a damp paper towel to wrap seeds into and tape to a window. Once the seeds started to sprout, we planted. -Farm Animal tail matching: Farm Animal Color Matching activity found here. Also, find a freebie of pig shape matching here & a shape barn matching freebie. -Sensory Sheep Sheering: I tried to find the inspiration I found on Pinterest for the activity but each domain was no longer in use. The class listened to an adapted story about farm animals and what we get from them. They learned they get wool from sheep and also get hats, sweaters, etc. I had my boyfriend, who is an artist, draw the cute sheep onto poster board. Then we used shaving cream to cover the sheeps body to look like sheeps wool. We taped the paper board to bins so the excess shaving cream could fall into them. The students each got a wide popsicle stick to 'sheer' the sheep. They took the shaving cream and spread it onto a photo of a shirt, hat or mittens to show the wool goes to these objects. -Farm Animal cleaning: We used two different buckets with water& soap and the other one had dirt in it. The plastic farm animals were found in the bucket with dirt. Students had to take the dirty farm animals and then place into the soapy water to clean. This was a great sensory activity to work on fine motor skills to clean each animal. -Pig in Mud craft: Students glued down the pre-cut construction paper materials. Then they used brown paint to cover the pigs to show the mud. It was a great activity to work on fine motor skills and following directions. |
AuthorMy name is Ms. Pre- K. I am new to blogging but not new to the education world. I will be going into my sixth year of teaching special education this September. Archives
March 2017
Categories |


 RSS Feed
